Create a Ringg AI workflow on the canvas: add call, wait, condition, action and message blocks, pass variables and data between steps, duplicate or archive it.
This page covers building, testing and publishing a workflow, plus the block reference with every setting; launching it at a list of contacts is Launch a workflow campaign, in the Campaigns chapter of Deploy. If you only need one conversation with several stages, a multi-prompt agent is simpler.In the dashboard: Sidebar → Workflows → Create workflow.
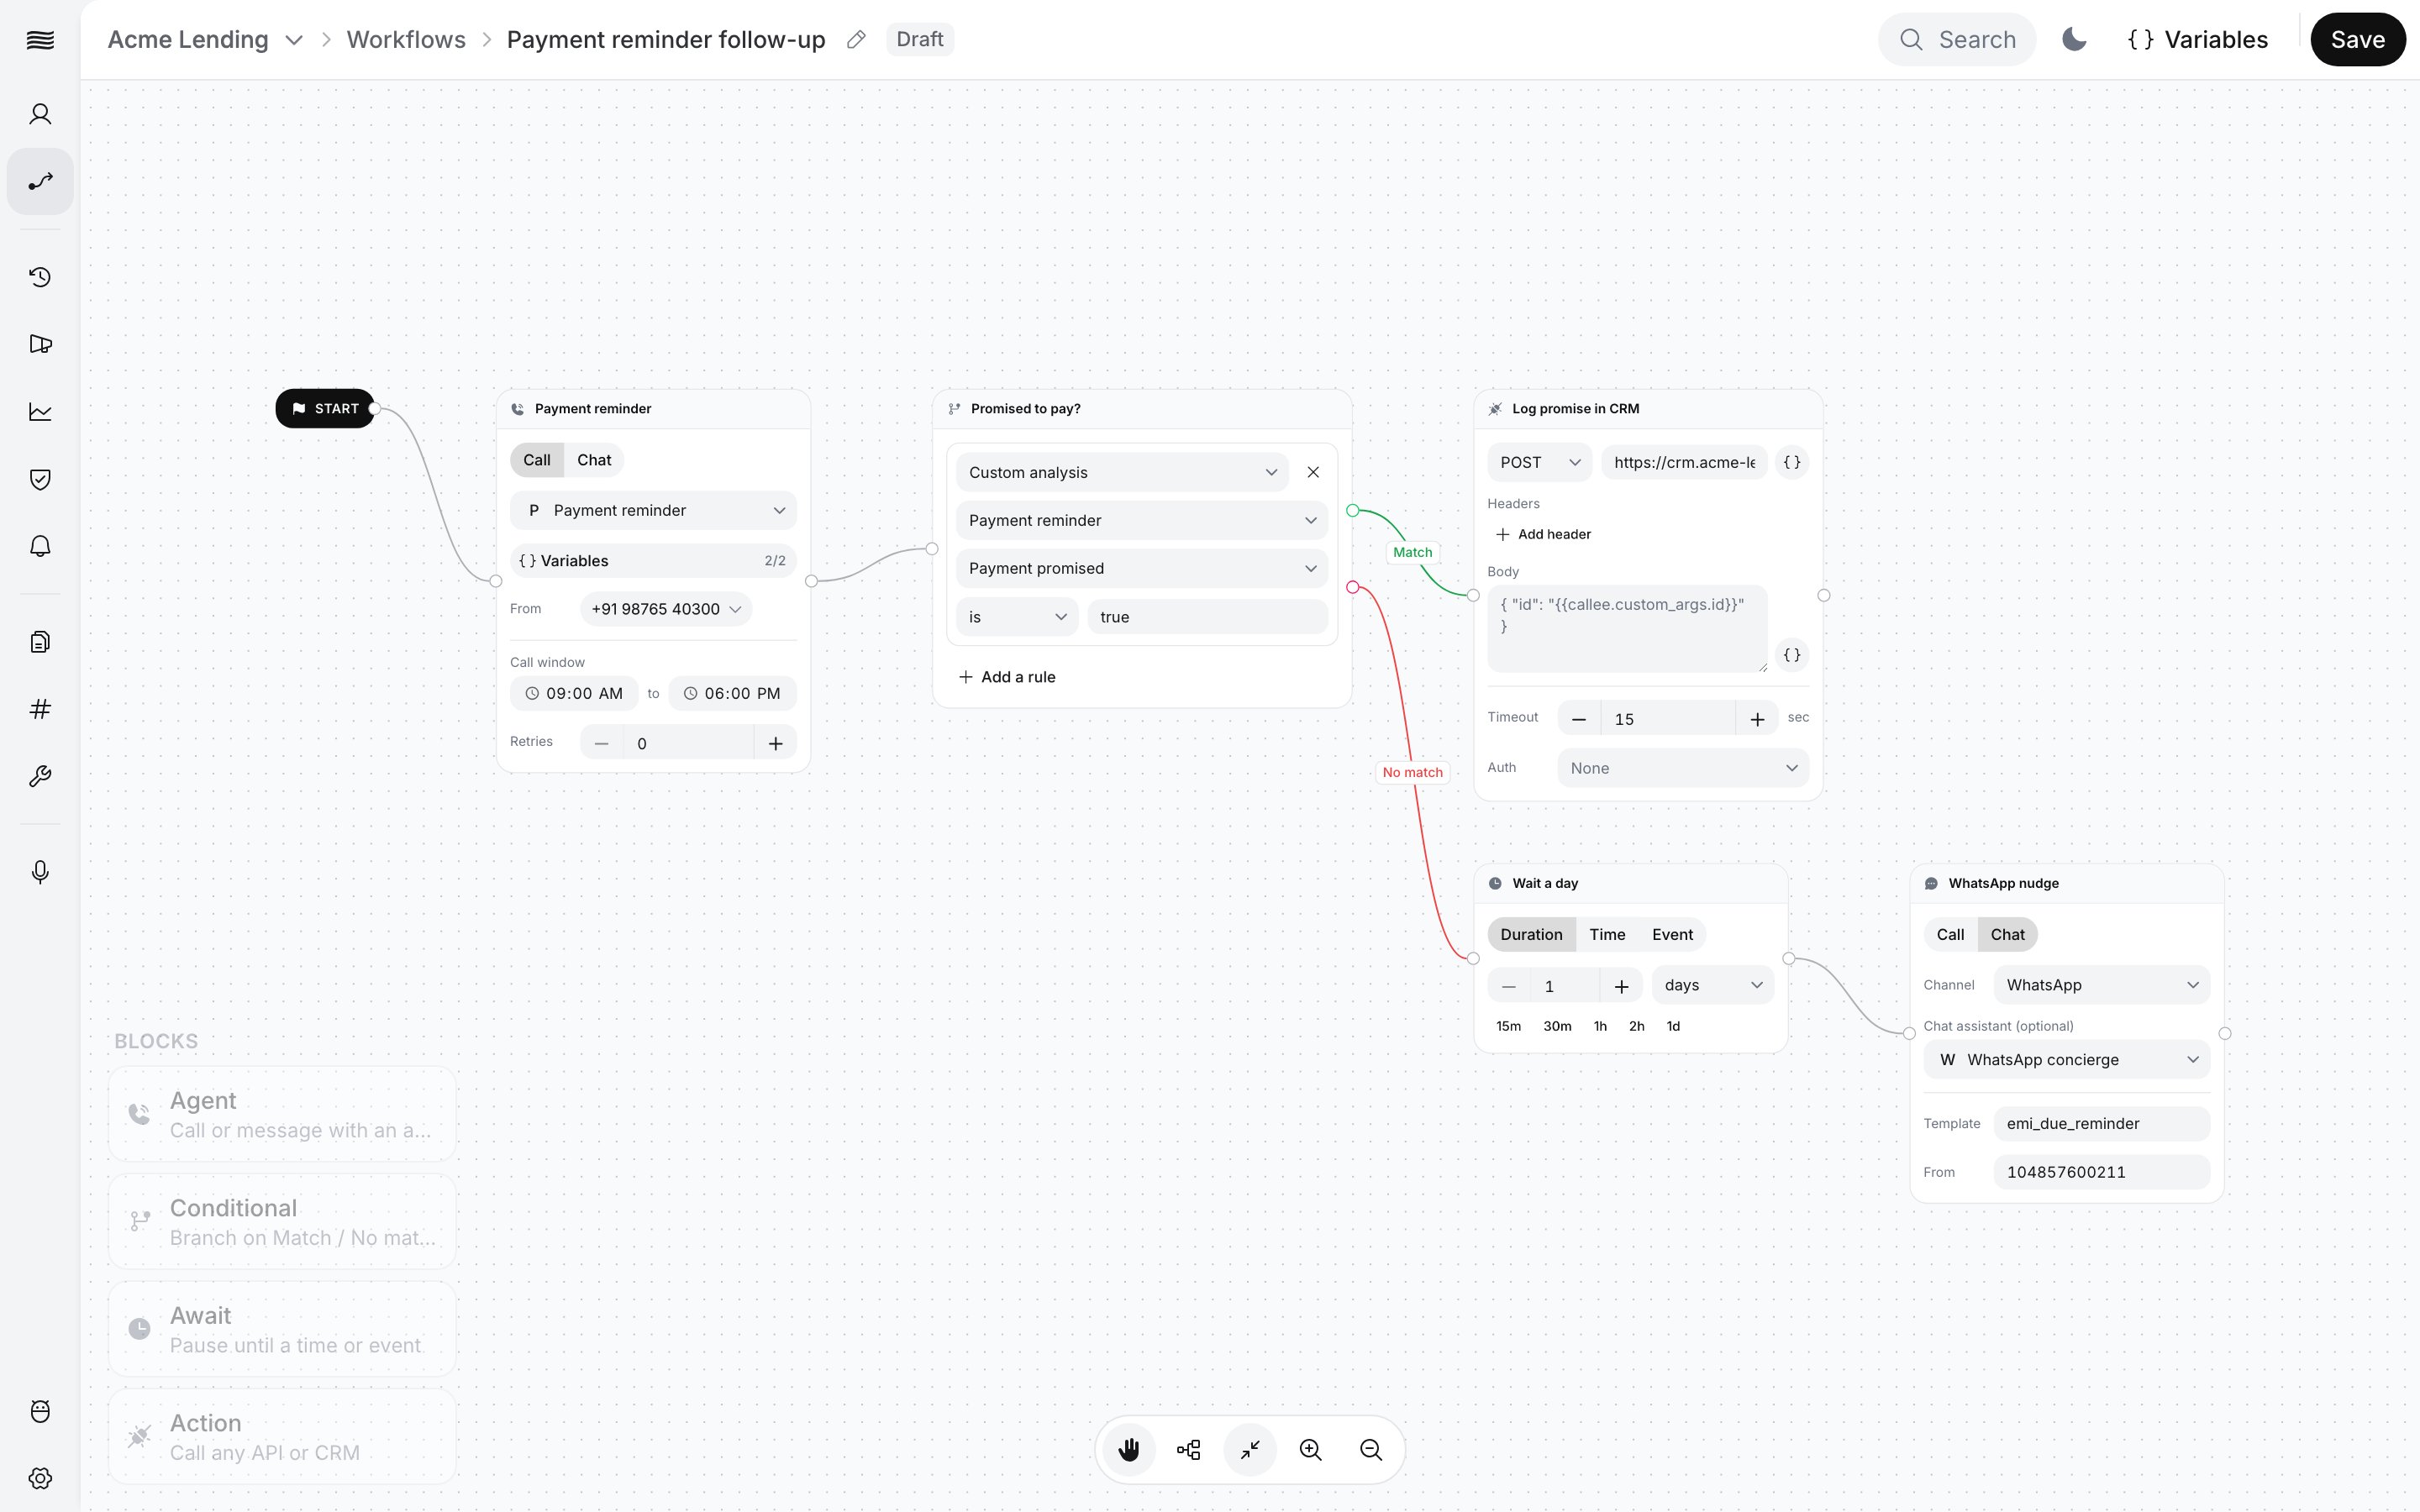
The video builds a payment-reminder workflow with every block type (a call, a branch on whether the customer promised to pay, a CRM update, a one-day wait and a WhatsApp nudge), then saves, publishes and tests it.
Building, publishing and testing a workflow
1
Open a blank canvas
Go to Workflows and click Create workflow. The editor opens with a Start marker. Nothing is saved yet.
2
Name it
Click the name in the breadcrumb at the top, type a name such as “Payment reminder follow-up”, and press Enter.
3
Add blocks
Drag a block from the Blocks panel (bottom left) onto the canvas, or click it to drop it in the middle of the view.
Click the + connector on the right of a block (or of Start) and pick the next block: it is added and connected in one step.
Drag from a connector into empty canvas: the most likely next block is added, already connected.
4
Connect the blocks
Drag from a block’s right-hand connector to the next block’s left edge. Start must connect to your first block.
5
Configure each block
Every setting is edited on the block’s card; the block reference lists them.
A call, a branch, then a CRM update or a wait and a WhatsApp nudge
6
Save
Click Save in the top bar. There is no autosave. The first save creates the workflow as a Draft.
Declares the workflow’s input variables. See Variables.
Save
Shown while you have unsaved changes.
Test
Starts one run. Shown once the workflow is saved and has no unsaved changes.
Publish
Shown while a draft version is waiting to be published.
2 issues chip (count varies)
Opens the Issues panel. Click an issue to jump to its block.
Canvas controls (bottom)
Hand tool (pan or select), Organize nodes, Fit to screen, Zoom in, Zoom out.
Keyboard
Delete or Backspace removes the selected blocks (Start cannot be deleted). Cmd/Ctrl + C, V, A, Z, Shift + Z and Y copy, paste, select all, undo and redo.
Click Variables in the top bar. Input variables are “Values each run starts with”: each row has a Name and an optional Default. Two rows are always present and cannot be renamed or removed: callee_name and callee_number. callee.* fields and block outputs need no declaration.A workflow campaign fills input variables from CSV columns; a test run asks you for them.
Text fields that accept variables have a {} button listing what that block can use, grouped as Workflow variables, Callee, Agent outputs and Application responses. Pick from the menu rather than typing paths: block references contain the block’s internal ID.
What
Example
A workflow input variable
{{plan}}
Callee name and number
{{callee.name}}, {{callee.mobile_number}}
An earlier call’s summary, duration or retry count
Pick Block name · Summary, Call duration or Retry count
An agent’s prompt reads variables such as callee_name or due_amount. On an Agent (Call) block, click Variables to open Map variables (“Assign values from earlier blocks, or type a literal.”): one row per variable the agent uses, each filled from the menu or with a literal value.If an earlier Agent block exists, the summary row is pre-filled (“Filled in from the previous call unless you change it.”). Saving with an empty row fails with “2 agent inputs need a value” (the count varies) and highlights the block.
On the Workflows list, hover a card and open its menu. Duplicate creates a draft named “Copy of …”. Archive asks for confirmation: “Archived workflows stop appearing in the main list and can’t start new runs. This can’t be undone.”