

Before you start
A knowledge base
Optional: for Agent nodes that answer from your documents.
Tools
Optional: on-call tools for Agent nodes, pre-call and post-call tools for the agent.
Create a multi-prompt agent
1
Open the create dialog
On the Agents page (listed under Assistants in the sidebar), click Create agent. The Create Assistant dialog opens.
2
Pick Multi Prompt
On the Outbound, Inbound or Webcall tab, under Create from scratch, click Multi Prompt (“Create assistant from scratch for complex workflows.”).
3
Start building
There is no form. The dashboard creates an agent named Untitled Workflow with a Start node and the custom variables
callee_name and mobile_number, then opens the canvas. Whichever tab you start from, the new agent is an outbound agent.You see “Workflow created successfully” and the canvas with a single Start node.
The canvas
The editor has two parts. The canvas on the left holds the nodes and their connections. The panel on the right shows the settings of the selected node, or Global Settings when nothing is selected; drag the divider to resize it. The video adds a node, opens a node’s settings, then opens Global Settings.Working on the multi-prompt canvas
- Add a node: click the dot on a node’s output. A picker lists the node types you can add there (connection rules).
- Drag to add: drag from an output dot to empty canvas. A preview of the next node follows the cursor; press Tab to switch its type, then release to place it. Drag onto an existing node to connect the two.
- Reuse an Agent node: once the flow has an Agent node, Agent opens a submenu with Blank agent and From existing (copies another Agent node’s setup).
- Name a node: click the name or the description at the top of its panel and type. Enter saves the name (Cmd/Ctrl+Enter for the description), Esc cancels. The name is what you see in the test summary, in the call’s path in Logs and from the MCP server, so name nodes by what they do: “Greet and confirm identity”, “Eligible?”.
- Canvas controls: Zoom in, Zoom out, Fit to screen, Organize nodes (auto-layout left to right) and Hand tool (H) for panning.
- Delete: each node has a delete action with a confirmation. To delete several, drag a box around them and press Delete or Backspace; Delete selection asks you to confirm. The Start node cannot be deleted.
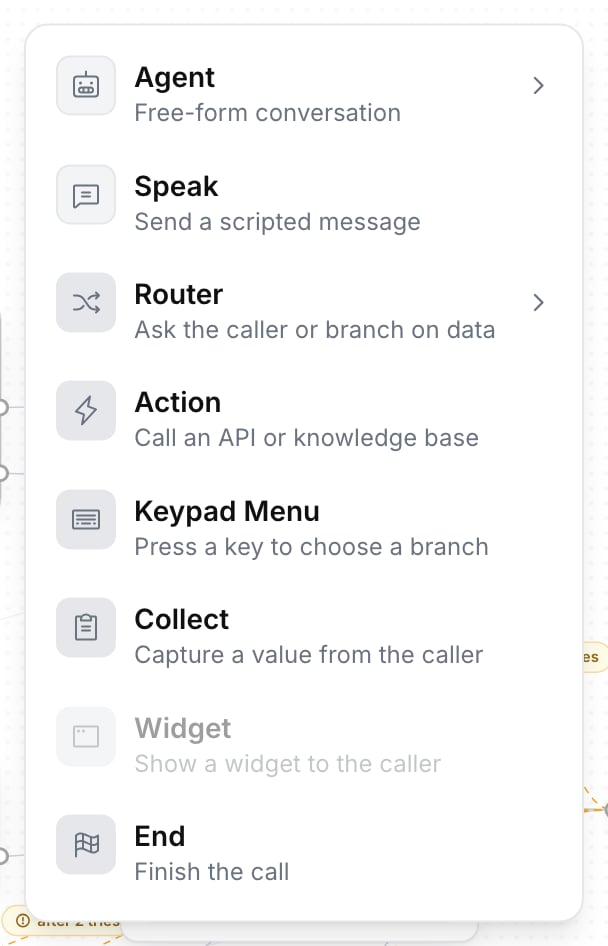
The node picker, opened from a router branch
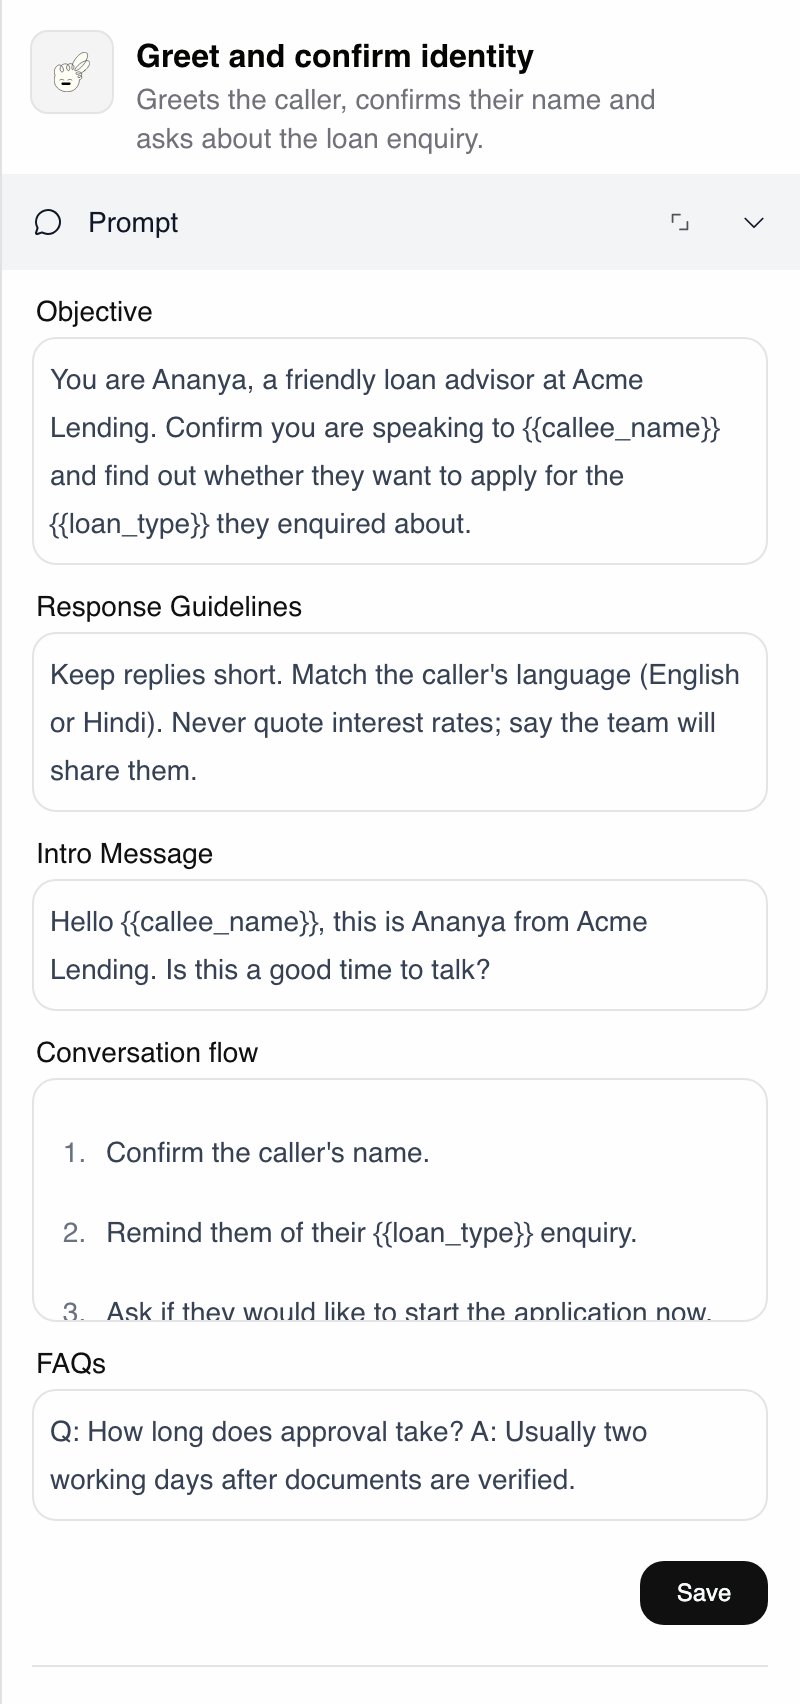
An Agent node's settings with the Prompt section open
Example flow
A rescheduling call, built from the node types below. Edge labels are the router’s conditions and the nodes’ outputs.Troubleshooting
Next steps
Publish changes and run A/B tests
Drafts, publishing, versions and traffic split.
Add tools to your agent
Pre-call, on-call and post-call tools.