Create a Ringg AI WhatsApp agent, attach a registered WhatsApp number, set the chat session timeouts, let it send approved templates and test it by QR code.
A WhatsApp agent answers messages on one registered WhatsApp Business number, from the same create dialog as every other agent type. A voice agent that only needs to send WhatsApp messages uses the WhatsApp tools instead.In the dashboard: Assistants → Create agent → WhatsApp.
The form is the one described in Create an agent; these are the WhatsApp-specific choices.
Creating a WhatsApp agent, picking a template it may send, setting the session timeouts and opening the test QR code
1
Choose the WhatsApp tab
Go to Assistants, select Create agent, and choose the WhatsApp tab. Under Create from scratch, pick the single-prompt WhatsApp template; its prompt already carries WhatsApp’s formatting rules.
2
Fill in the basics
Enter the Agent Name, Primary Language and optional Secondary Language, and pick a voice (the form requires one; the agent speaks with it when a customer calls the number from WhatsApp). Select Next.
3
Describe the business and goal
Fill in the Call context fields: what the business is and what the chat should achieve. Ringg writes the first version of the prompt from them. Add any Custom variables and Knowledge Base the agent needs.
4
Select the WhatsApp number
Under Select WhatsApp Number, pick the registered number this agent answers on (which numbers are listed); an empty list reads No WhatsApp numbers connected. You can leave it empty and attach one later.
The WhatsApp number step of the create form
5
Create
Select Create Assistant.
The agent editor opens. On the Assistants page, set Channels to WhatsApp to find it again.
A WhatsApp agent answers on exactly one number, and each number serves one agent at a time. Messages to a number with no agent attached get no reply. The list offers a number only when it belongs to the connected WhatsApp Business account, shows Ready, and no other agent uses it.
In the agent editor’s left menu, expand Attach Number (in the top group, below WhatsApp Templates).
Open WhatsApp Number and choose a number. It saves as soon as you choose. The last option, Connect WhatsApp Number, takes you to add and register one.
To move a number to another agent, clear it on the agent that has it, then attach it on the new agent. De-registering or archiving a number detaches it, and the agent stops answering until you attach another.
Pre-call, on-call and post-call tools as usual. Pre-call tools run on the customer’s first message without holding up the reply; a field a tool didn’t return resolves to “not available”. End Chat sits under Chat Tools in the on-call side panel.
A WhatsApp conversation is one chat. The customer’s first message opens it, and it stays open while messages keep flowing. It closes when:
Trigger
What happens
The agent ends it
The agent calls End Chat, writes a closing message and closes the chat.
The customer goes quiet
After the idle timeout (3 hours by default) with no customer message, the chat ends. Their next message opens a new chat.
It reaches the maximum length
After the maximum length (24 hours by default), however active, the next message opens a new chat.
A new chat starts without the previous chat’s messages. Closing the chat is what runs post-call tools and analysis and fires chat_completed, so when a customer stops replying, those results arrive after the idle timeout.
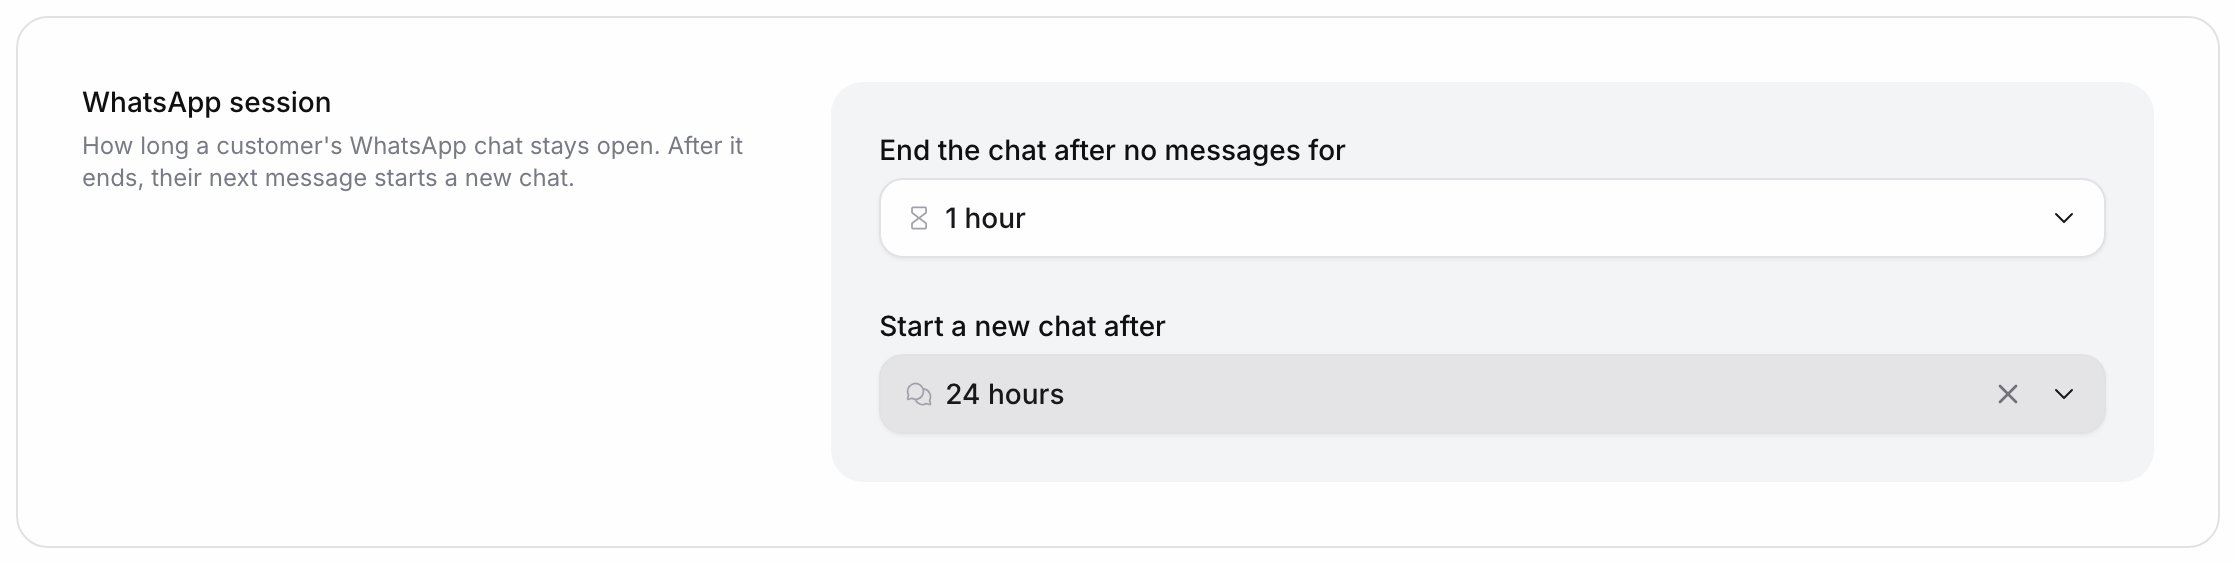
Shorter timeouts give you post-call results and webhooks sooner; longer ones keep context for customers who take hours to reply. A chat keeps the timeouts it started with, so a change applies to chats that open afterwards.In the agent editor, open Chat → Settings. Under WhatsApp session:
Setting
Default
Options
End the chat after no messages for
3 hours
15 or 30 minutes; 1, 2, 3, 6, 12 or 24 hours
Start a new chat after
24 hours
1, 6, 12 or 24 hours; 2, 3, 5 or 7 days
Each change saves immediately. The second dropdown only offers values at or above the first; raising the idle timeout above the session length raises the length in the same save.
The WhatsApp session settings under Chat → Settings
End Chat closes the chat straight away, so post-call tools and analysis run without waiting for the idle timeout. Mention it in the prompt as @||end_chat|| where the conversation should end. Use it instead of @||end_call||: End Call and the other call tools don’t run during a chat.
Keep replies short, one to three small paragraphs. WhatsApp folds long messages behind “Read more”.
Use WhatsApp formatting only: *bold*, _italic_, ~strike~, and lines starting with - or 1. for lists.
Skip Markdown headings, tables and [label](url) links. Send the bare URL; WhatsApp makes it clickable.
Don’t mention calls, audio, holding or keypad input. The customer is typing.
Mention every on-call tool and template with @ where it should be used, and @||end_chat|| where the chat ends.
You are Neha, a WhatsApp assistant for Acme Insurance. You help customers renewtheir health policy.- Greet the customer by name if {{name}} is available, and ask how you can help.- Answer plan questions from the knowledge base. Keep each reply under 80 words.- When the customer is ready to renew, send the renewal link with @||send_renewal_reminder|| and tell them it has been sent.- Use *bold* for plan names and prices. Never use headings or tables.- When the customer says they're done, thank them and end the chat with @||end_chat||.
A WhatsApp agent can send an approved template mid-chat: a brochure, a payment link, a quick-reply menu. Use WhatsApp Templates for this. The Send WhatsApp Template integration tool can’t send templates in a chat; it is for voice agents and post-call sends.
1
Select the templates
In the editor’s left menu, expand WhatsApp Templates and select Select Template. The list shows the approved templates of the attached number’s account; tick each one the agent may send. Manage templates opens Message templates.If the section says Attach a WhatsApp number to this assistant first, attach one. Rows the agent can’t send yet are disabled with the reason: Authentication templates, location headers, text headers with more than one variable, buttons with a variable link, copy-code and Flow buttons.
2
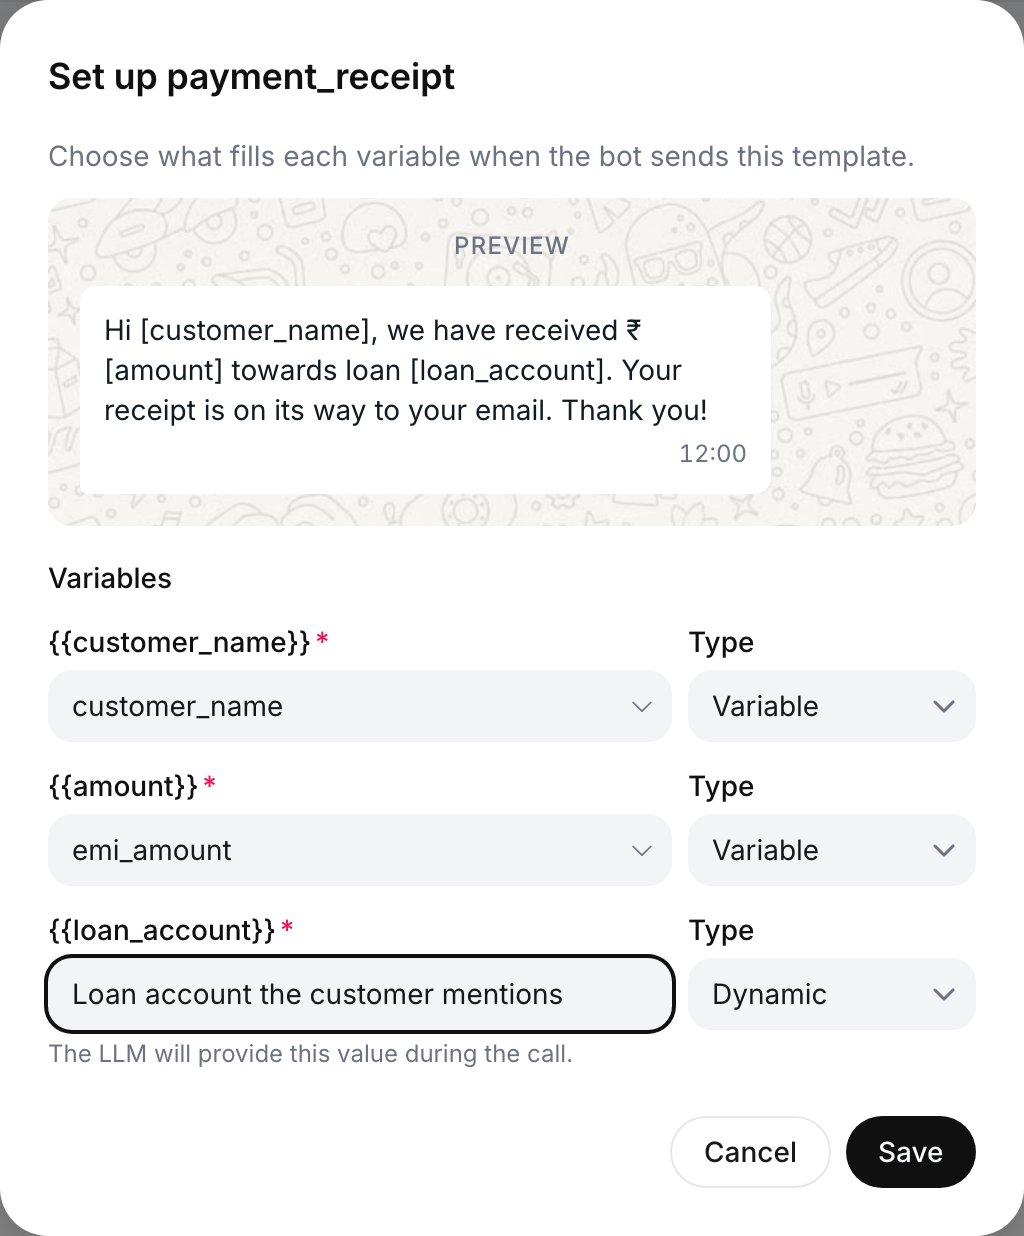
Fill in the variables
If the template has variables or a media header, a dialog asks what fills each variable:
Static: fixed text, sent as written.
Variable: a custom variable such as {{name}}, filled when the chat starts.
Dynamic: the agent fills it from the conversation, for example the plan the customer chose.
For an image, video or document header, paste a public https:// link; the same file goes out on every send.
Setting up a template with named variables
3
Tag the template in the prompt
Type @ in the prompt and pick the template under WhatsApp Templates. Its tool name is send_ plus the template name, for example @||send_renewal_reminder||; if that name is already taken, the language code is appended.
Each selected template is listed under WhatsApp Templates with its language; the pencil re-opens the variable dialog and the bin removes it. A line under the name flags one that can no longer be sent as set up: Not in this WhatsApp account, Template rejected (or another non-approved status), or Variables changed, edit to re-map.The template is the agent’s whole reply for that turn, and each send appears in the chat transcript under Logs → WhatsApp. If a Variable isn’t available in a chat, the agent fills it from the conversation. When the customer taps a quick-reply button or swipes to reply to an earlier message, their reply reaches the agent with a short quote of that message, so “yes, this one” is understood in context.
Select Test assistant in the editor’s top bar. A QR code for the attached number appears with “Scan to start a WhatsApp chat”. Scan it with your phone’s camera, or use Open in WhatsApp, and send a message. If the dialog says “No number attached”, attach a number and reopen Test assistant.
No. A number is attached to one agent at a time; move it by clearing it on the first agent.
Why is my test chat still Ongoing in Logs?
It stays Ongoing until it closes, and post-call tools, analysis and chat_completed wait with it. Lower End the chat after no messages for while testing.
Can a WhatsApp agent be multi-prompt?
No. The Multi Prompt card is hidden on the WhatsApp tab and Convert to multi-prompt isn’t offered for WhatsApp agents.