

Before you start
An outbound agent
The agent that makes the calls. Note its variables.
A number or number pool
The caller ID: a bought or imported number, or a pool of them.
A calling list (CSV)
One row per contact, with a column for each variable.
In the dashboard
The page is titled Campaign Setup and has two steps: Upload details and Configure campaign.Both steps, from the campaign name to Create campaign
1
Upload details
- In the Campaign details card, enter a Campaign name that names the audience, month and purpose, for example
October payment reminders; it is how you find the campaign later in Logs and Analytics filters. - Leave Campaign type on Assistant. (Workflow runs a multi-step workflow per contact instead: Workflow campaigns.)
- In Select assistant, search for and pick your agent, for example “Payment reminder”.
- In the Upload calling list card, drag your CSV onto the box or click Select File (format).
- In the Calling list settings card that appears, set the Country code, map each variable in Map variables to CSV columns, and choose Remove invalid rows and Transliterate variables.
- Click Next. Ringg uploads and verifies the list (“Processing CSV…”, then “CSV verified successfully”) and opens step 2. If your balance doesn’t cover the campaign, you are sent back to the campaigns list instead (troubleshooting).
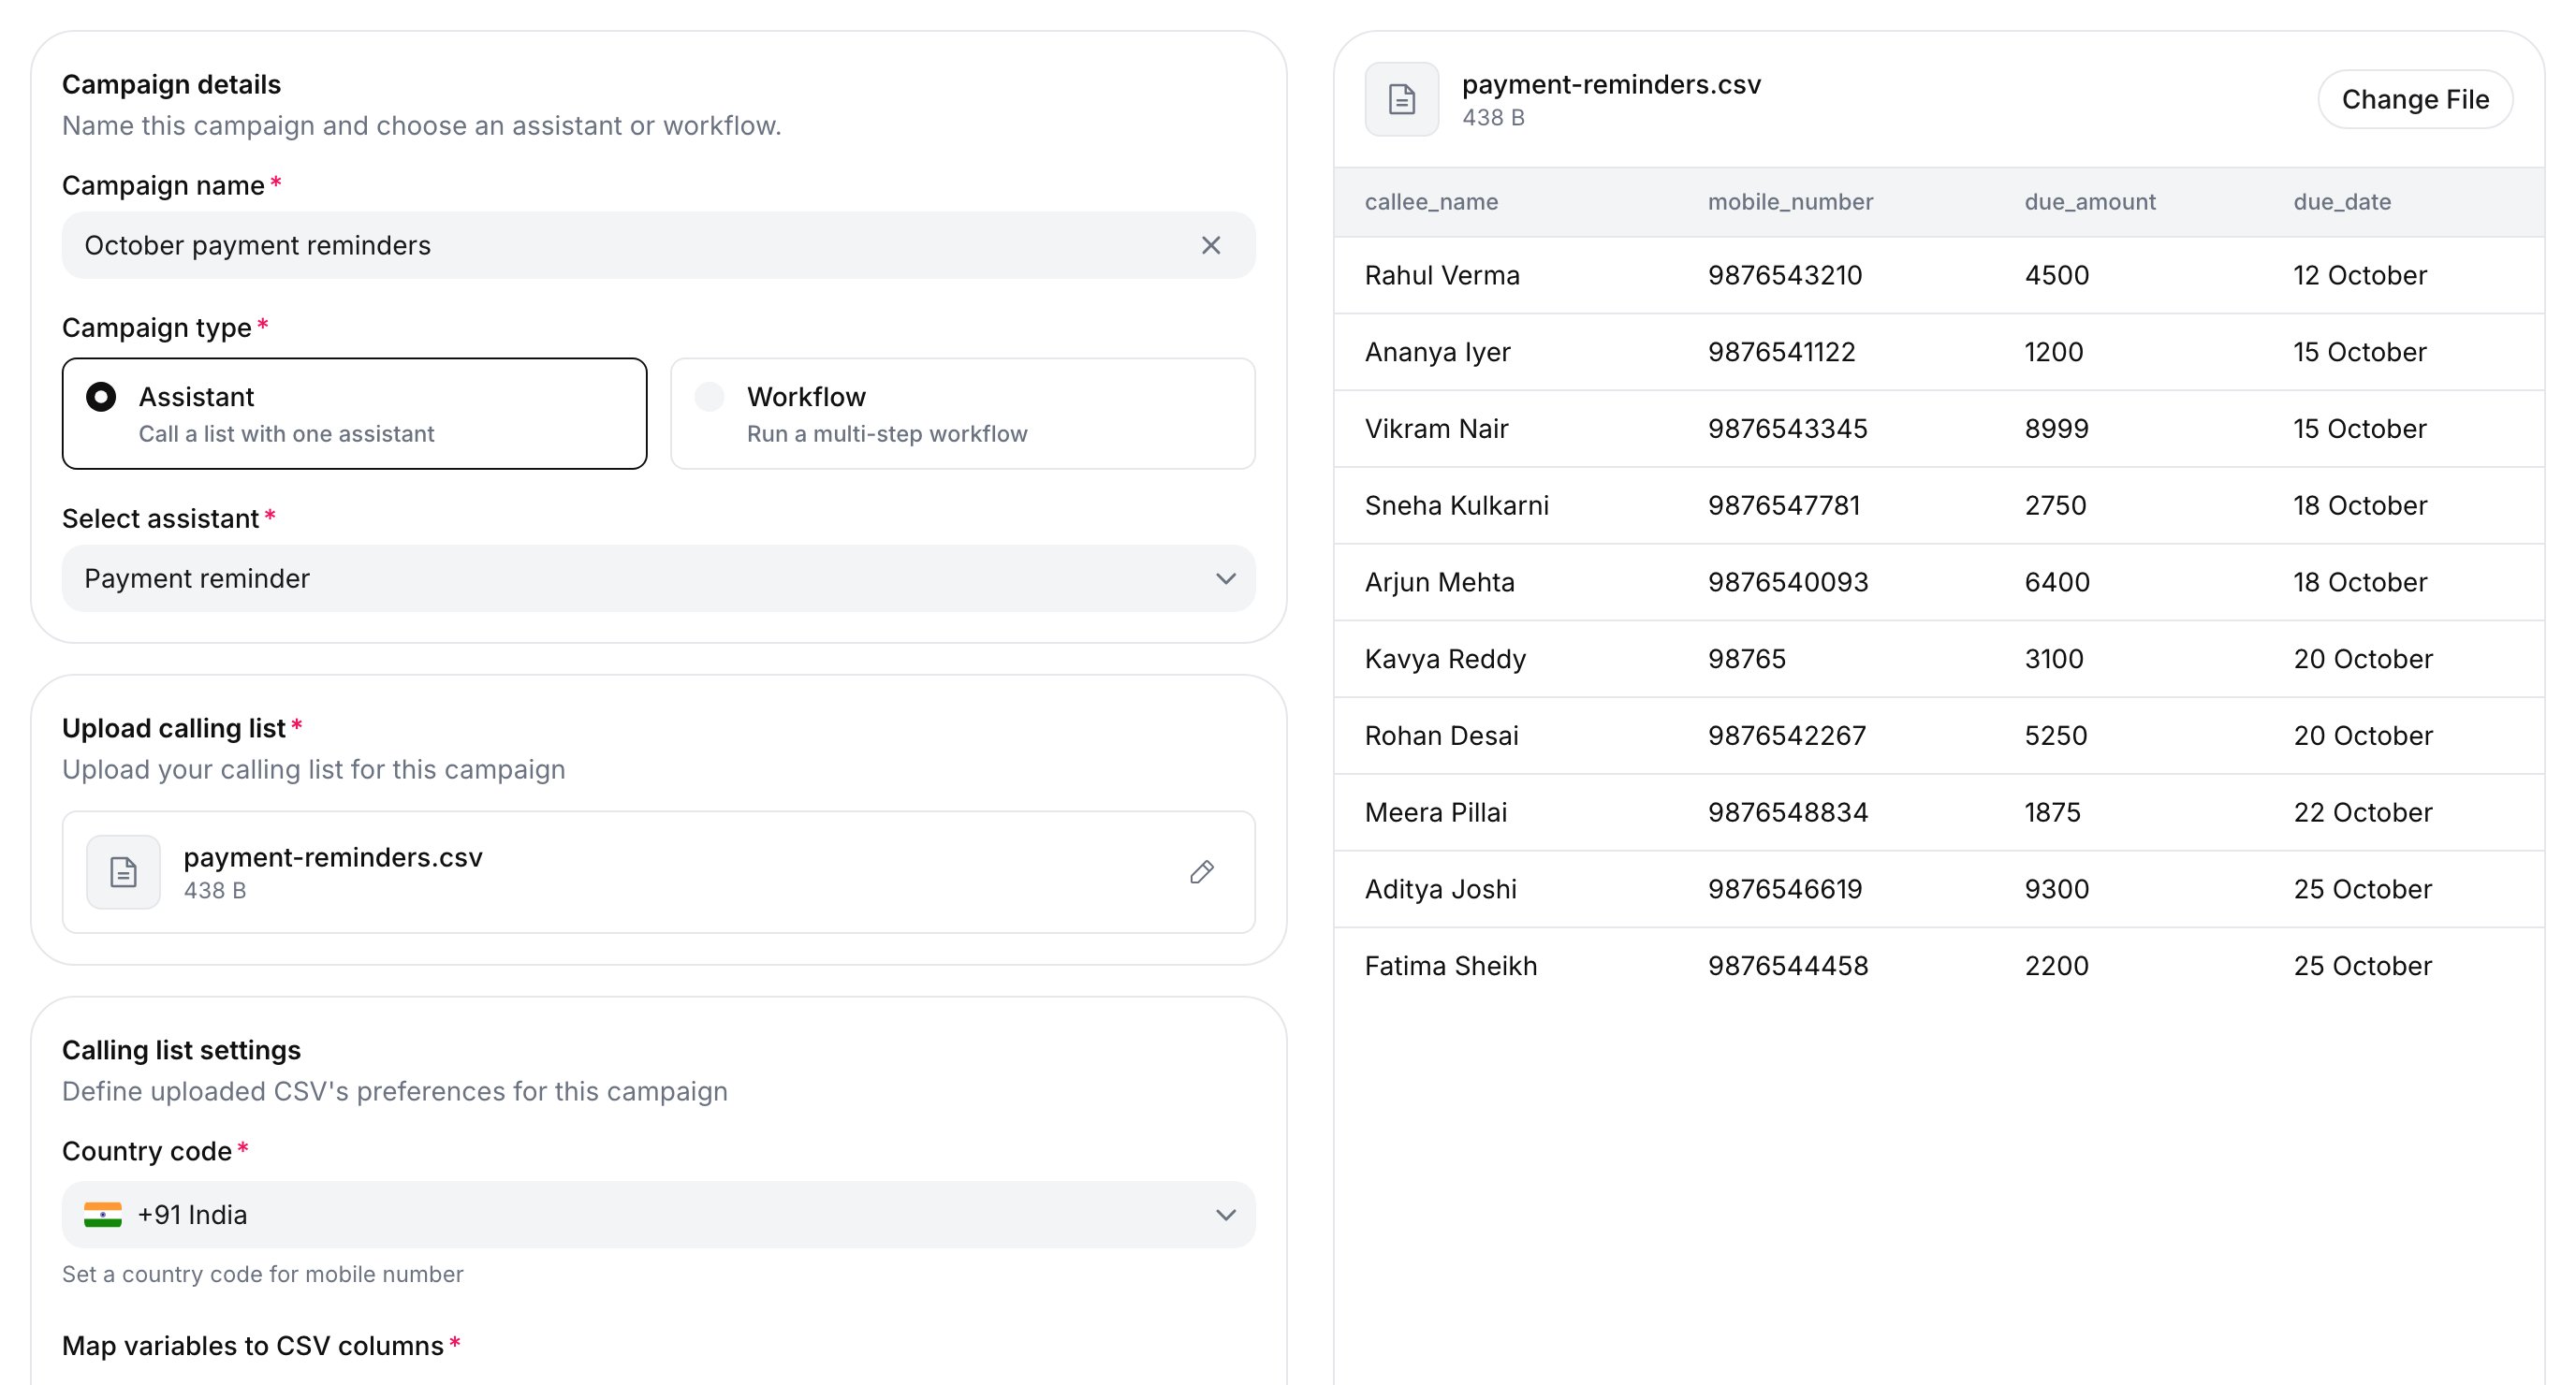
Step 1, Upload details, with a CSV chosen
2
Configure campaign
- Under Select number, choose Individual numbers and pick one or more Numbers, or choose Number pool and pick a pool. These set the . No numbers yet? Buy or import a number or create a number pool.
- Under Campaign settings, set the Timezone, Start date & time and End date & time.
- Next to Calling windows, click Edit to change the hours the campaign may call (see Calling windows rules). The campaign’s windows replace the agent’s own (Calling window) for this campaign’s calls.
- Set the Retry count and Cooldown Period (the between attempts). More retries reach more people, but every retry counts toward call limits and takes a concurrency slot; the connectivity-by-attempt chart in Analytics shows whether later attempts still connect.
- In Email notifications, pick the workspace members to notify. They get one email when the campaign is set up and its calls are scheduled, and one when it completes, with the totals, credits used and a link to download the report (valid for 7 days). A terminated campaign sends no completion email. To add someone, first invite them.
- Click Create campaign.
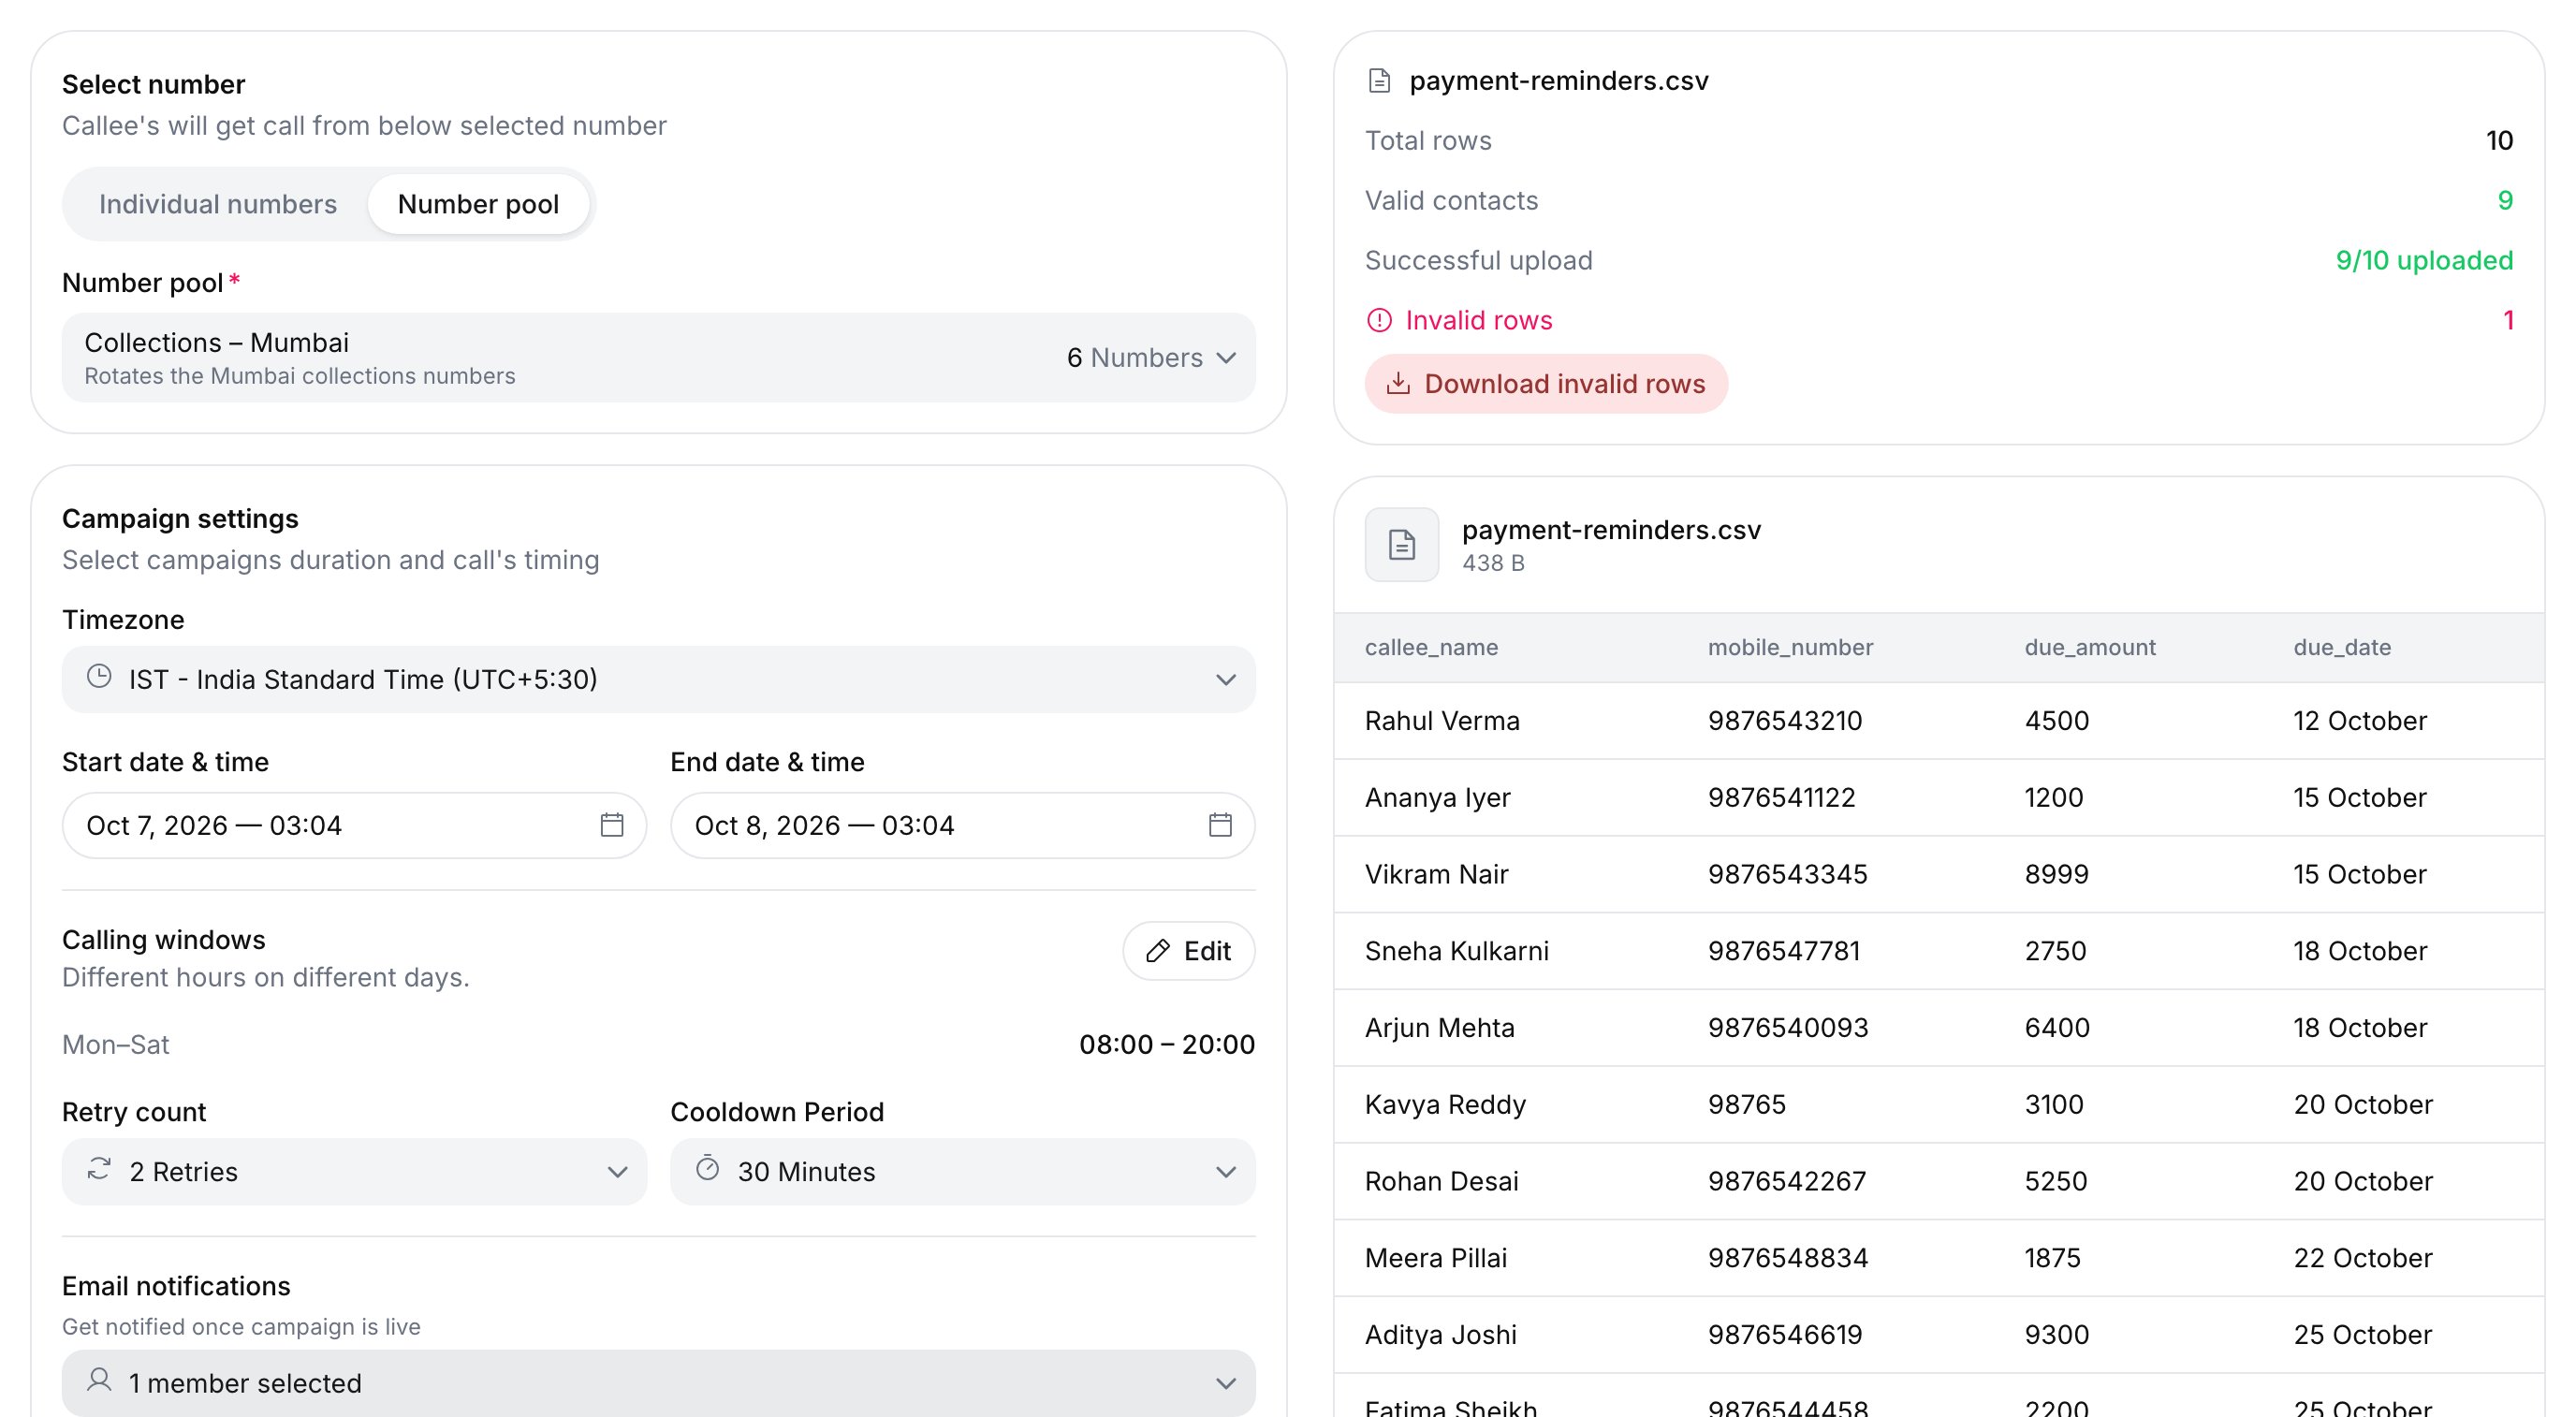
Step 2, Configure campaign
You see “Campaign created successfully!” and the campaign appears on the campaigns list.
Upload details fields
Every field is required unless marked optional.
The right side previews your file, 15 rows per page.
Configure campaign fields
The dashboard uses one Cooldown Period whether the last attempt was busy, not picked up, or failed. Raising Retry count from No Retry while the cooldown is 0 Minutes changes the cooldown to 5 Minutes.
Calling windows rules
Edit opens the Calling windows editor. Choose Daily (the same hours every day the campaign runs) or Weekly (different hours per weekday), drag on the calendar to add a window, then click Save.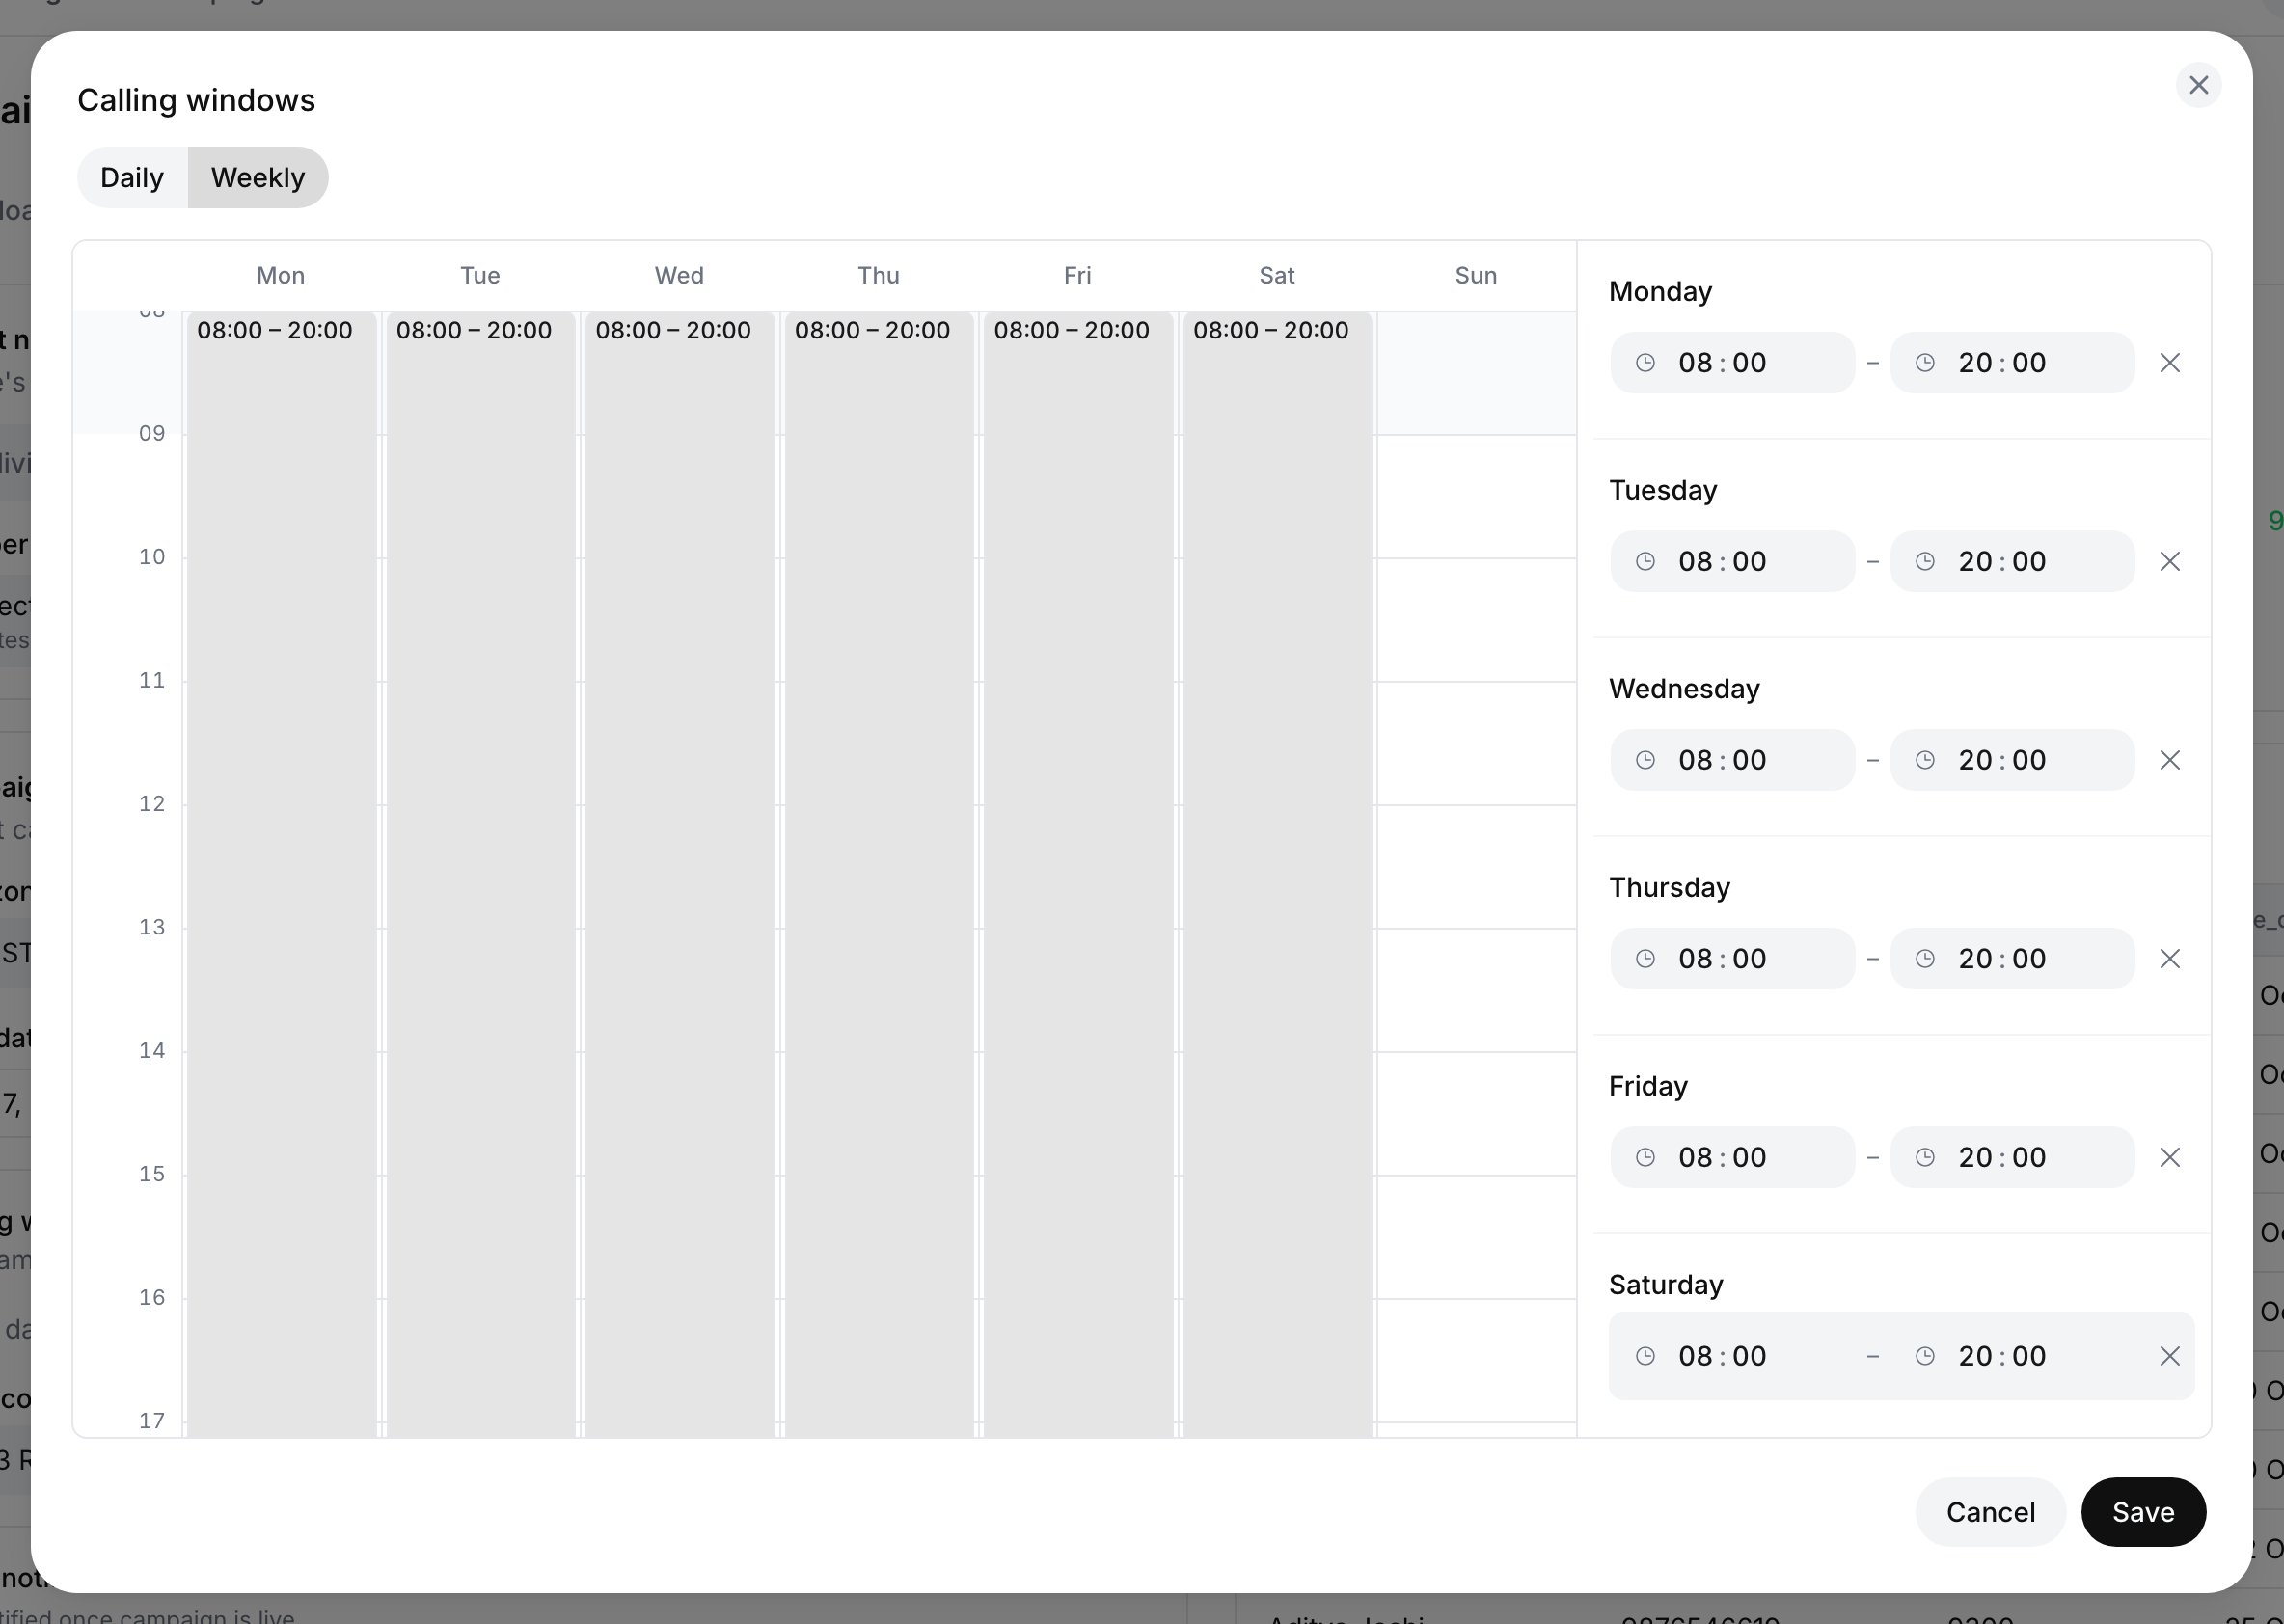
The Calling windows editor in Weekly mode
- At least 1 window and at most 25.
- Each window is at least 30 minutes long, in 15-minute steps.
- Windows on the same day can’t overlap.
- A window can’t cross midnight. For 22:00–02:00, add 22:00–24:00 and 00:00–02:00 as two windows.
Verify it worked
- The new campaign appears with a status such as Preparing, Scheduled or Ongoing. See Campaign statuses.
- Once the start time passes inside a calling window, calls appear in Logs. The campaign’s History button opens them. See Manage a running campaign.
- By API, Get all campaigns lists the campaign and its status.
Troubleshooting
Next is disabled
Next is disabled
Next needs a campaign name, an agent, a CSV, a country code and a column for every variable. See Map variables to columns.
After Next, I'm sent back to the campaigns list with Insufficient balance
After Next, I'm sent back to the campaigns list with Insufficient balance
Your balance doesn’t cover the campaign, so it is kept with the status Insufficient Balance. Select it and click Add Balance, which opens billing with the amount needed. Once the balance covers it, the campaign returns to Draft: select it and click Complete Setup. You don’t need to upload the list again. See When balance runs out.
My number is missing from Numbers
My number is missing from Numbers
Test numbers can’t be used in campaigns and are not listed. If you have no other numbers, the card says “No numbers available.” with a Buy numbers link. See Buy or import a number.
A number pool can't be selected
A number pool can't be selected
Pools with no numbers are greyed out. Add numbers to the pool first. See Number pools.
Create campaign is disabled
Create campaign is disabled
Pick a number or a pool, set a timezone and both dates, and check that no calling windows overlap. See Calling windows rules.
I left the page after Next
I left the page after Next
The campaign is saved as a Draft. On the campaigns list, click its name, or select it and click Complete Setup, to return to Configure campaign. Settings you already entered in step 2 are kept only in the same browser.
Next steps
Manage a running campaign
Watch status, split concurrency, terminate and open the campaign’s calls.
Read call logs
Open each campaign call’s transcript, recording and analysis.