

Objective
Add the three values that change on every reminder call as custom variables and use them in the prompt, so one agent serves every customer.The scenario
In part 2, Ananya said the same thing to everyone. Rahul Verma owes ₹12,450 on 15 October; Priya Sharma owes ₹4,500 on 18 October. The amount, the date and the loan account change per call, so they become variables: the prompt names them once, and each call fills in its own values, from the Test assistant dialog now and from a campaign CSV in part 4.Hands-on
Adding a variable and using it in the prompt
1
Open Custom Variables
In Ananya’s editor sidebar, click Custom Variables. The panel lists
callee_name and mobile_number, the two permanent variables, with no remove button.2
Add due_amount
Type
Due Amount into Enter variable name. As you type, letters become lowercase and spaces become _, so the field reads due_amount. Click Add or press Enter: “Variables updated successfully”. There is no separate Save.3
Add the other two
Repeat for
due_date and loan_account. The three new rows sit at the bottom of the list, each with a bin icon.4
Use them in the prompt
Open Prompt. In Conversation Script, type
@ where a value belongs and pick it under Custom Variables; it becomes a chip. Rewrite the steps so they read:- Confirm you are speaking to
@{{callee_name}}about loan account@{{loan_account}}. - Tell them their EMI of
@{{due_amount}}is due on@{{due_date}}. - Ask when they will pay.
5
Cover a missing value
A call goes ahead even when a variable has no value. A variable sent empty is left blank; one that is not sent at all stays in the prompt as the literal text
@{{due_date}}. So add a line to the script: “If the due date is not known, ask the customer to check their statement.” Click Save: “Changes saved successfully”.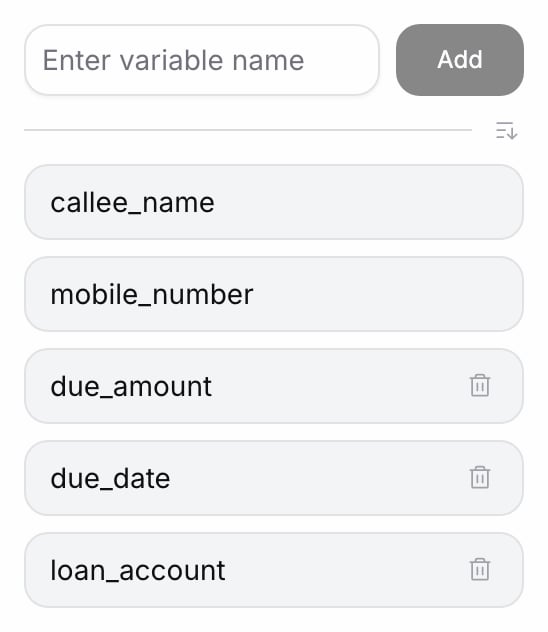
The Custom Variables panel after adding loan_account
Checkpoint
Custom Variables lists
due_amount, due_date and loan_account below callee_name and mobile_number. The prompt shows them as chips with no red underline, and Test assistant shows one field for each.Exercise
Create a variable from the prompt instead of the panel: in any section, type@{{branch_name and choose Create "{{branch_name}}" from the menu. Expected result: a branch_name chip in the text and a new row in Custom Variables. Then remove the variable with its bin icon: the chip turns red with a wavy underline, because the agent has nothing to fill it with. Delete the chip before you save.
What you learned
- A variable is written once in the prompt and filled per call: from Test assistant now, from a CSV column or the API’s
custom_args_valueslater. - Names are lowercase with
_and unique per agent; the input converts as you type. - A red token names something the agent does not have. Fix every one before you save.