Walk the Ringg AI dashboard’s sidebar, top bar and Settings, open the command palette, and find where to copy the agent, number, campaign and call IDs.
Part 1: Getting to know Ringg AI · Lesson 3 of 3 · 15 minutes
Acme’s team will share the dashboard: you build Ananya, a colleague uploads the calling list, and a developer wires the results into the CRM. Each needs a different section, and the developer needs IDs. This lesson walks the screen once so later lessons can say “open Monitor → Logs”.
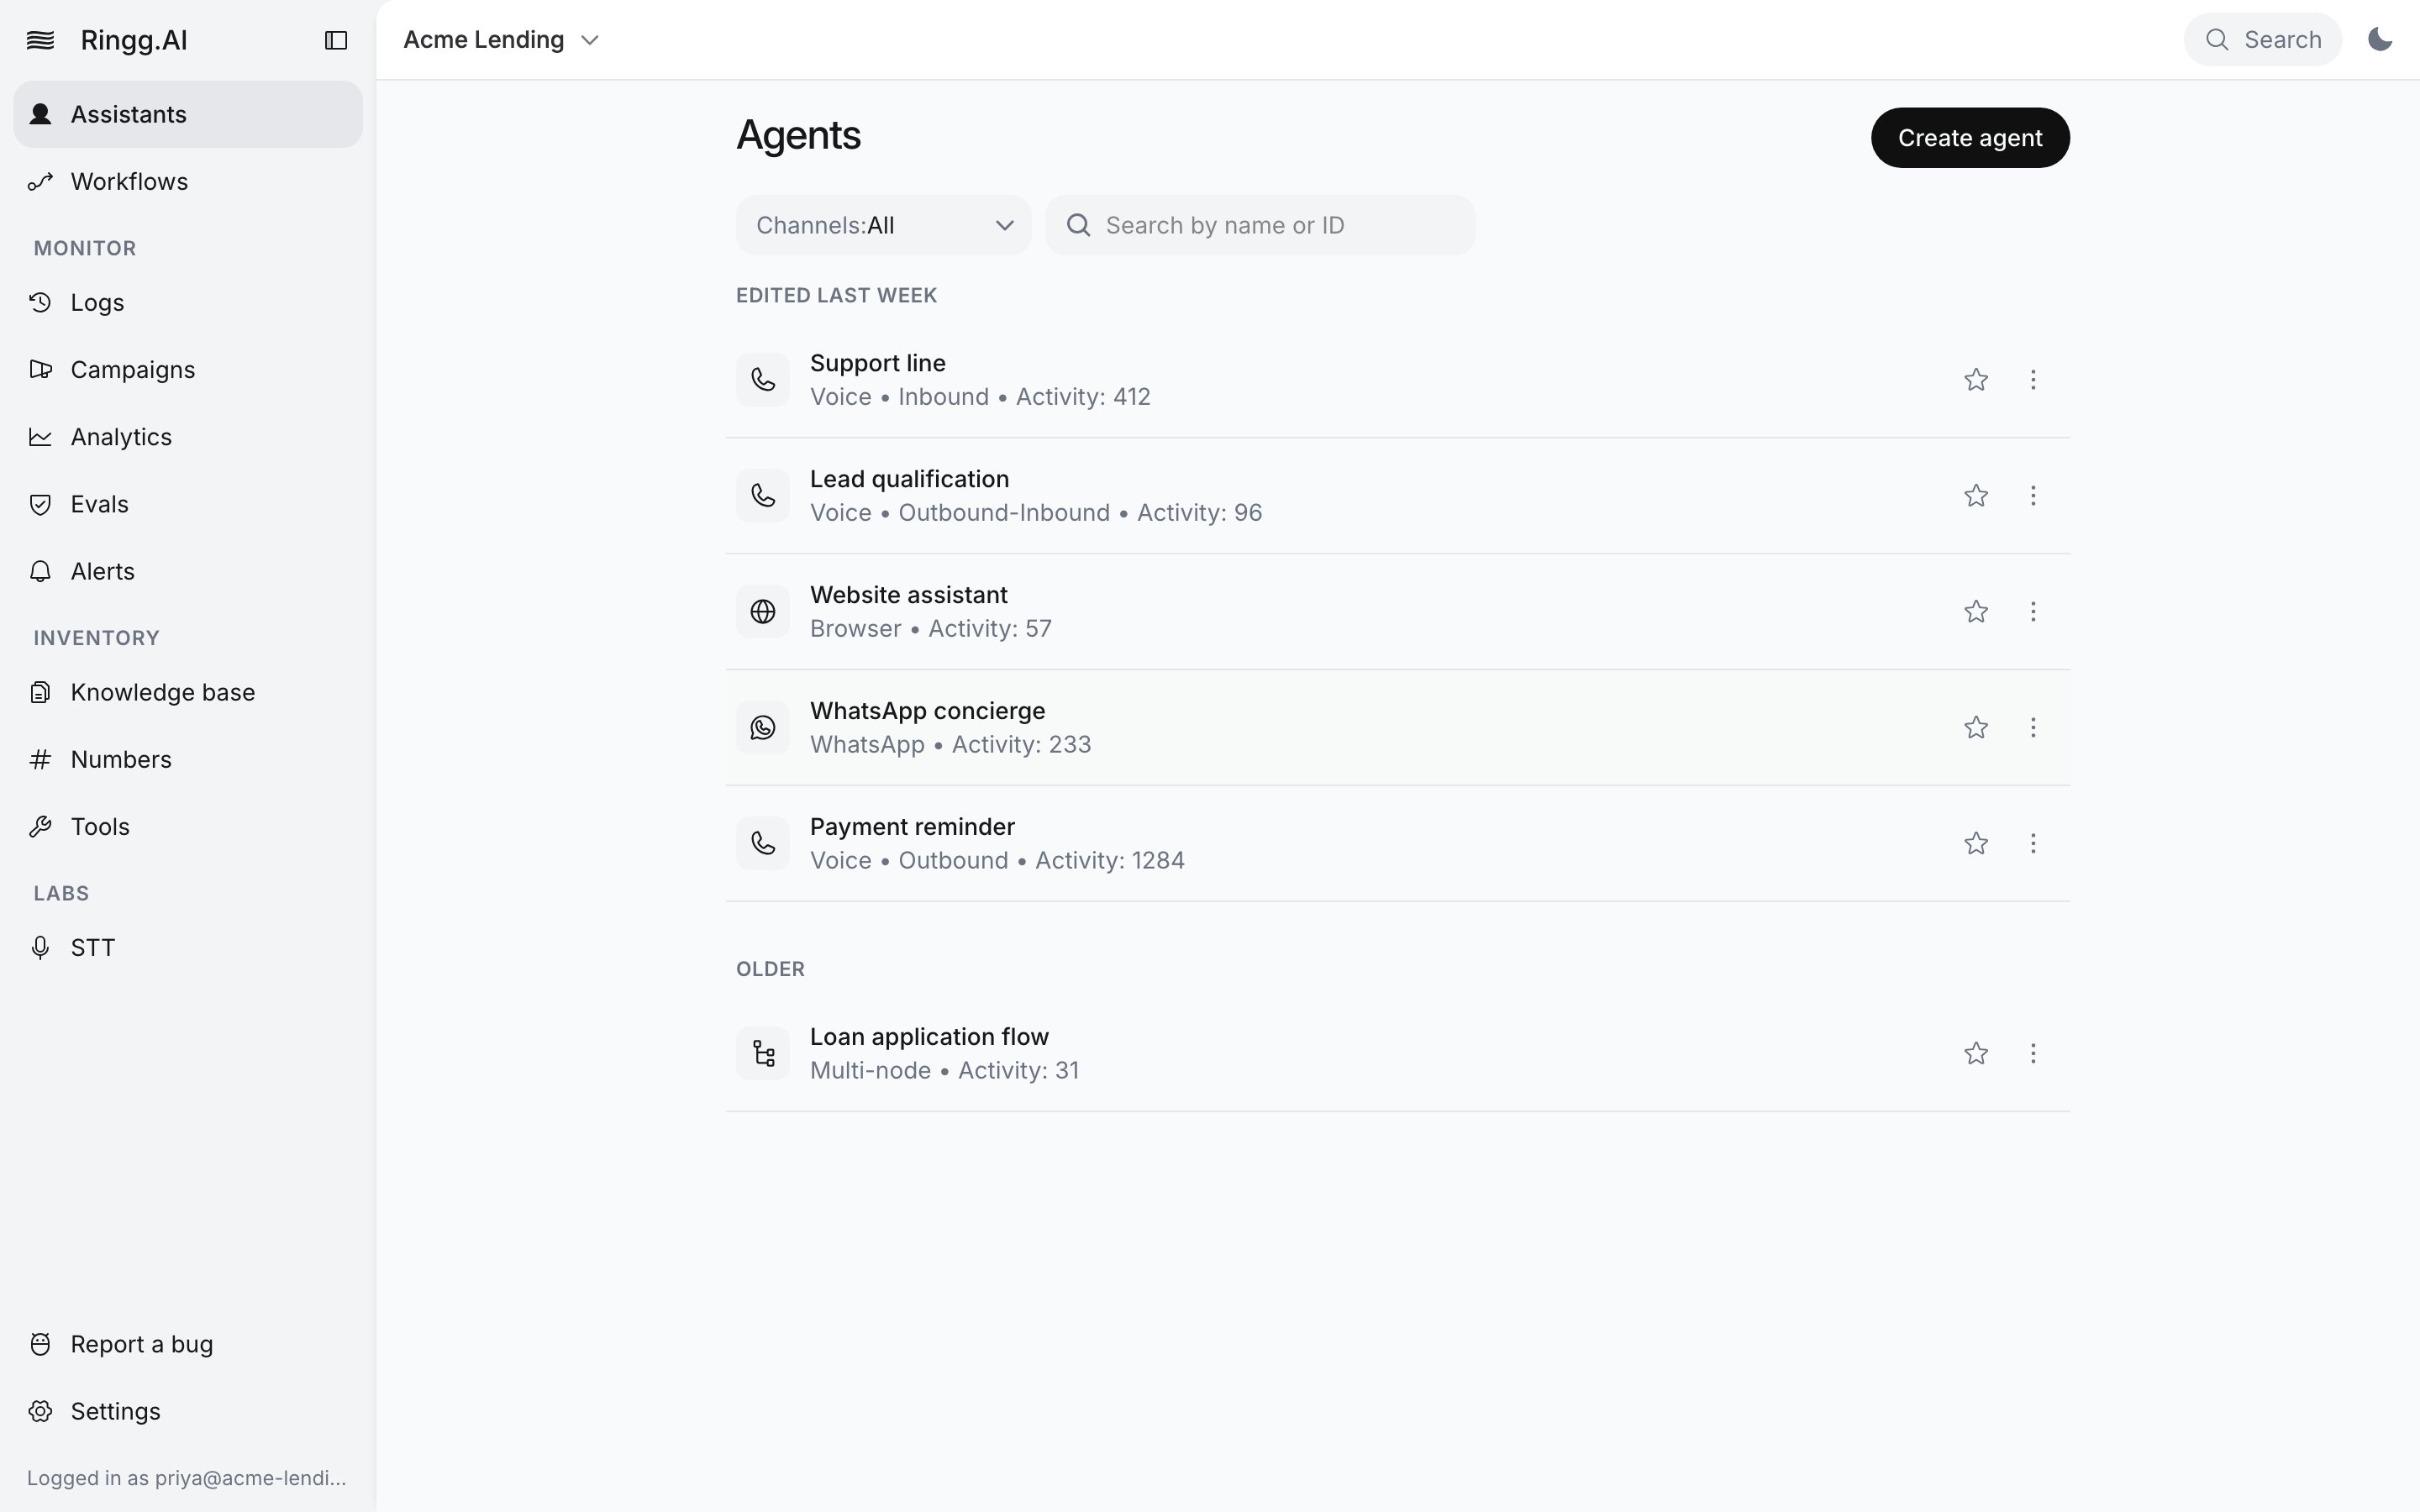
The sidebar groups its items under Monitor, Inventory and Labs, with Assistants and Workflows above the groups. Collapse or expand it with ⌘ + . (Ctrl + . on Windows and Linux).
The dashboard: sidebar, top bar and the Agents page
If your sidebar shows only Logs, Analytics, Alerts and Settings, you are in a primary workspace: switch to a Ringg Space with the workspace switcher to build agents.
2
Open each Monitor item
Click through Logs, Campaigns, Analytics, Evals and Alerts. Logs has three tabs, Phone, WhatsApp and Workflows; Ananya’s calls land under Phone. Campaigns is where the calling list goes in part 4.
3
Open each Inventory item
Knowledge base holds the files and web pages agents look up. Numbers has a Phone tab, with All Numbers and Number Pools, and a WhatsApp tab. Tools holds tools you set up once and reuse in any agent; its URL is /integrations.
4
Use the top bar
The first crumb is the workspace switcher; Copy workspace ID sits beside each workspace in its menu. Search opens the command palette (⌘ + K or Ctrl + K). The credits figure shows your balance (prepaid) or used / limit (postpaid); click it to open Billing plan.
5
Look at Settings
Settings, at the bottom of the sidebar, has its own menu under Workspace, Access and Billing. Two items matter for these lessons: Company details (), needed for some test calls, and API key, which the developer needs for the capstone.
6
Note where the IDs are
Each object has a copy button next to its ID:
Agent: beside the agent name in the top bar of the editor, or from the URL /assistants/<agent_id>.
Number: the ID column on Numbers.
Campaign: beside the ID in the campaign’s detail panel.
Call: beside the call ID in the call panel in Logs.
The API key is shown once, when generated under Settings → API key. Share it through a secret manager.
You can open every item under Monitor and Inventory from memory, the command palette opens with ⌘ + K, and you know which button or column holds each ID.
Press ⌘ + K (or Ctrl + K) and type Billing. Expected result: the palette offers the Billing plan settings page; opening it shows your balance, concurrency, transactions and invoices.