> ## Documentation Index
> Fetch the complete documentation index at: https://docs.ringg.ai/llms.txt
> Use this file to discover all available pages before exploring further.
> ## Agent Instructions
> To search or read these docs, connect the Ringg docs MCP server at https://docs.ringg.ai/mcp (no key needed; tools search_ringg_ai and query_docs_filesystem_ringg_ai) instead of browsing pages one by one. Setup for each client: https://docs.ringg.ai/resources/mcp-server/docs-mcp-server/mcp-for-ai-assistants.md
> The dashboard labels agents "Assistants"; these docs say "agent". Both mean the same object, identified by agent_id.
> API base URL: https://prod-api.ringg.ai/ca/api/v0. Send the workspace API key in the X-API-KEY header, from server-side code only.
> Placing a call dials a real phone number and spends credits. Confirm the number with the user before calling.
> To act on a Ringg workspace (place calls, edit agents, read transcripts), use the separate Ringg workspace MCP server at https://mcp.ringg.ai/mcp: https://docs.ringg.ai/resources/mcp-server/workspace-mcp-server/overview.md
# WhatsApp tools
> Send a WhatsApp template or text from any Ringg AI agent, during a call or chat with an on-call tool, or after it ends with a post-call tool, and see each send in Logs.
export const RelatedTopics = ({items}) =>
;
**Send WhatsApp Template** and **Send WhatsApp Text** are integration tools for any agent, voice or WhatsApp, once [WhatsApp Business is connected](/documentation/inventory/tools-integrations/connect-whatsapp) with a **Ready** number (and, for templates, a **Ready** template). They work on-call, where the agent sends at the point your prompt names, and post-call, where Ringg sends after the call or chat ends. Each send appears in the call's transcript in [Logs](/documentation/monitor/logs) as a tool call, with the sender, recipient, template and Meta's result.
To send a template in the middle of a WhatsApp chat, don't use these tools: pick the template under **WhatsApp Templates** instead ([how](/documentation/build-agents/agents/whatsapp-agents/create-an-agent#send-a-template-during-a-chat)).
## On-call
### The two tools
| Tool | Sends | Phases |
| - | - | - |
| **Send WhatsApp Template** | An approved template with its variables filled. Delivered at any time. | On-call and [post-call](/documentation/build-agents/customize-agent-behaviour/tools/whatsapp-tools#post-call) |
| **Send WhatsApp Text** | Free-form text. Delivered only within 24 hours of the customer's last WhatsApp message. | On-call only |
Neither runs as a pre-call tool. A customer who has never messaged your number is outside the 24-hour window, so for a first contact use the template tool.
### Add the tool
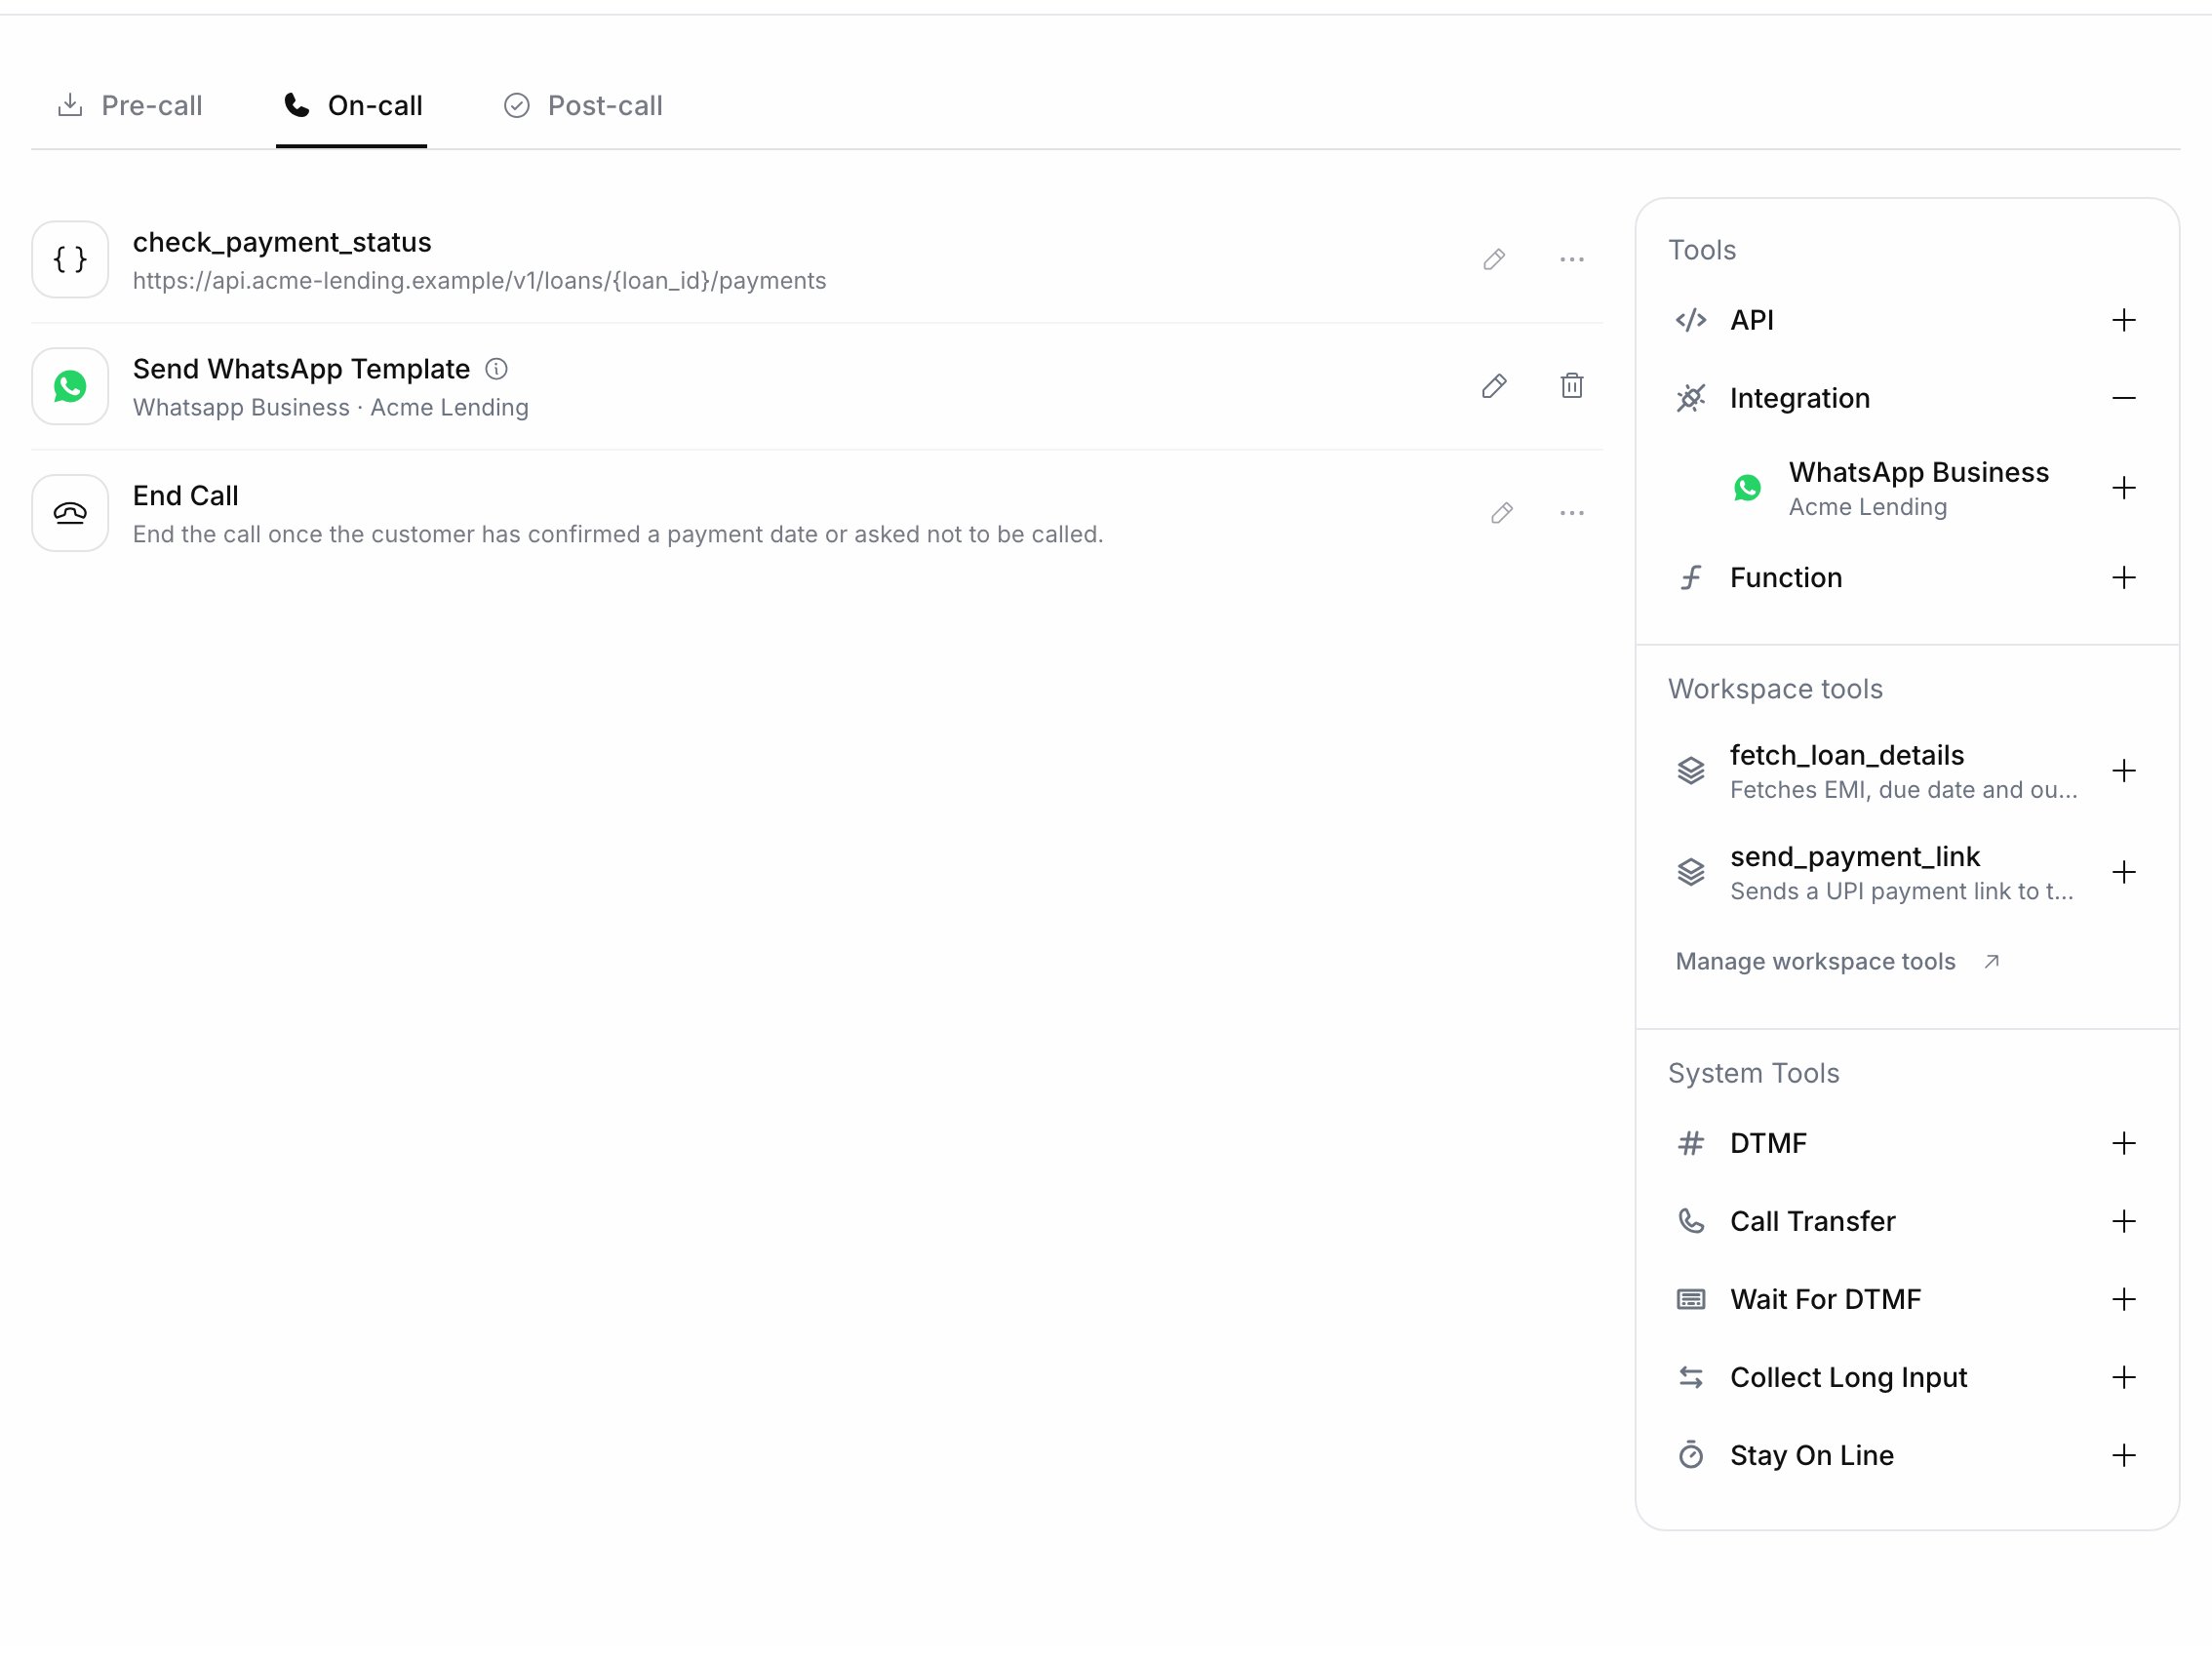
In the agent editor, select **Tools** in the left menu, then the **On-call** tab.
In the side panel, expand **Integration** and select **WhatsApp Business** (your account name is shown beneath it). The account's **Available Tools** are listed.
Expand **Send WhatsApp Template** or **Send WhatsApp Text**:
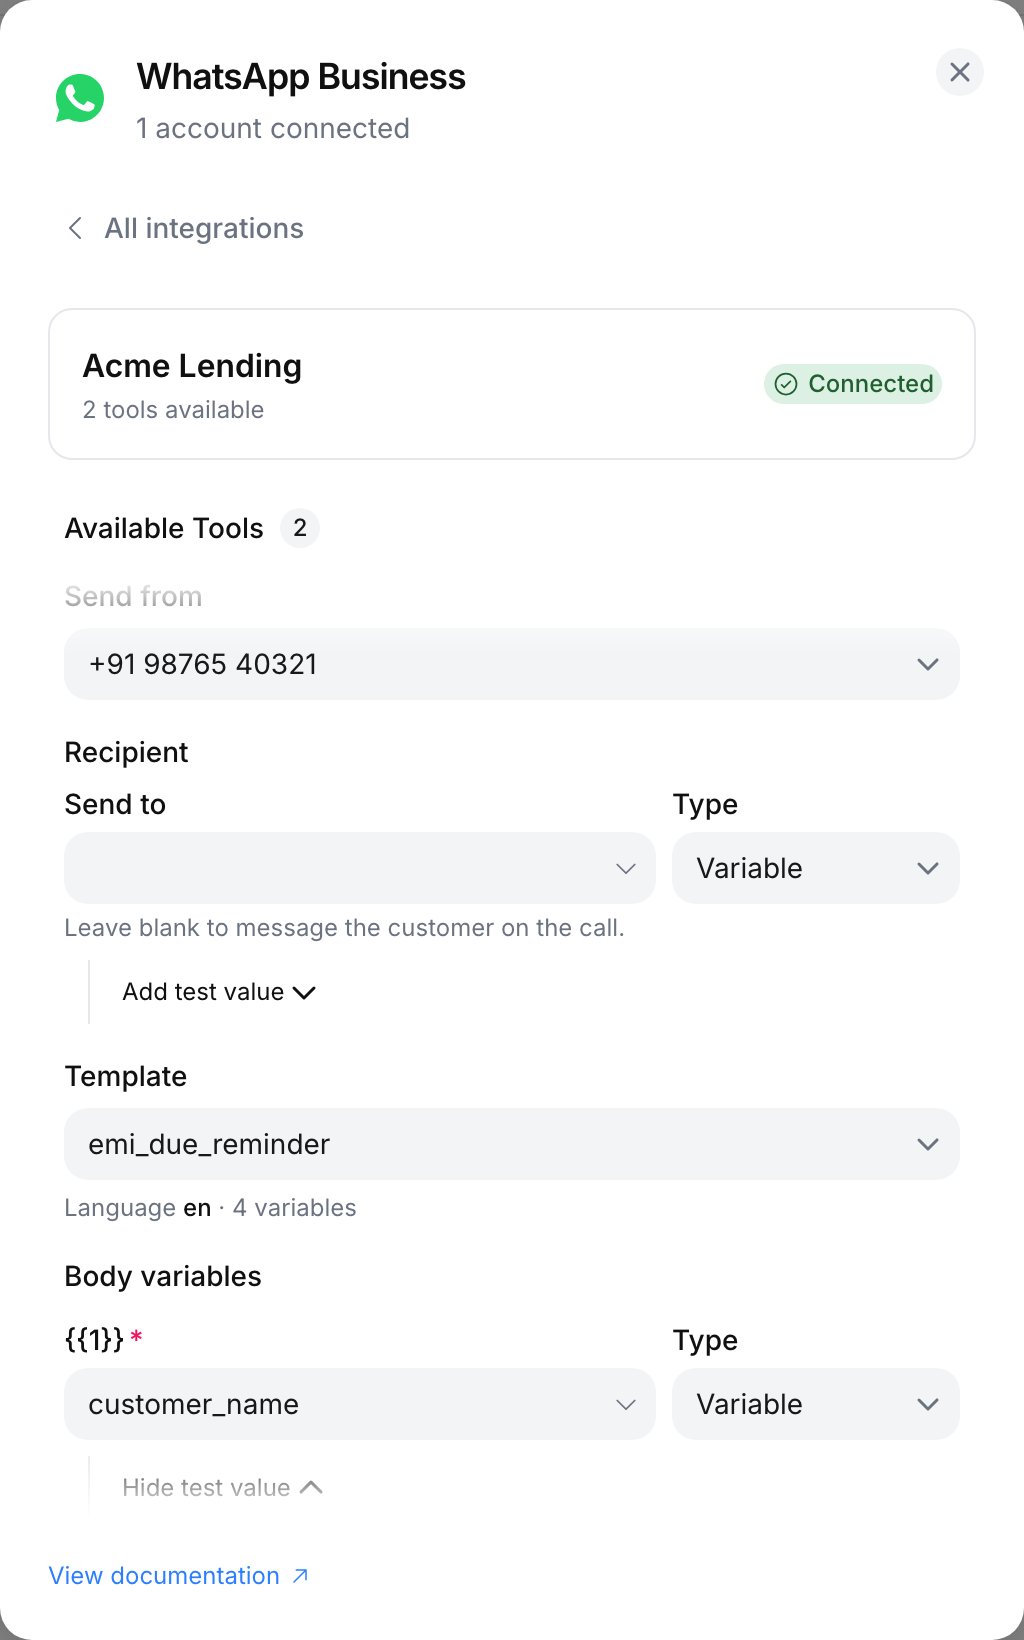
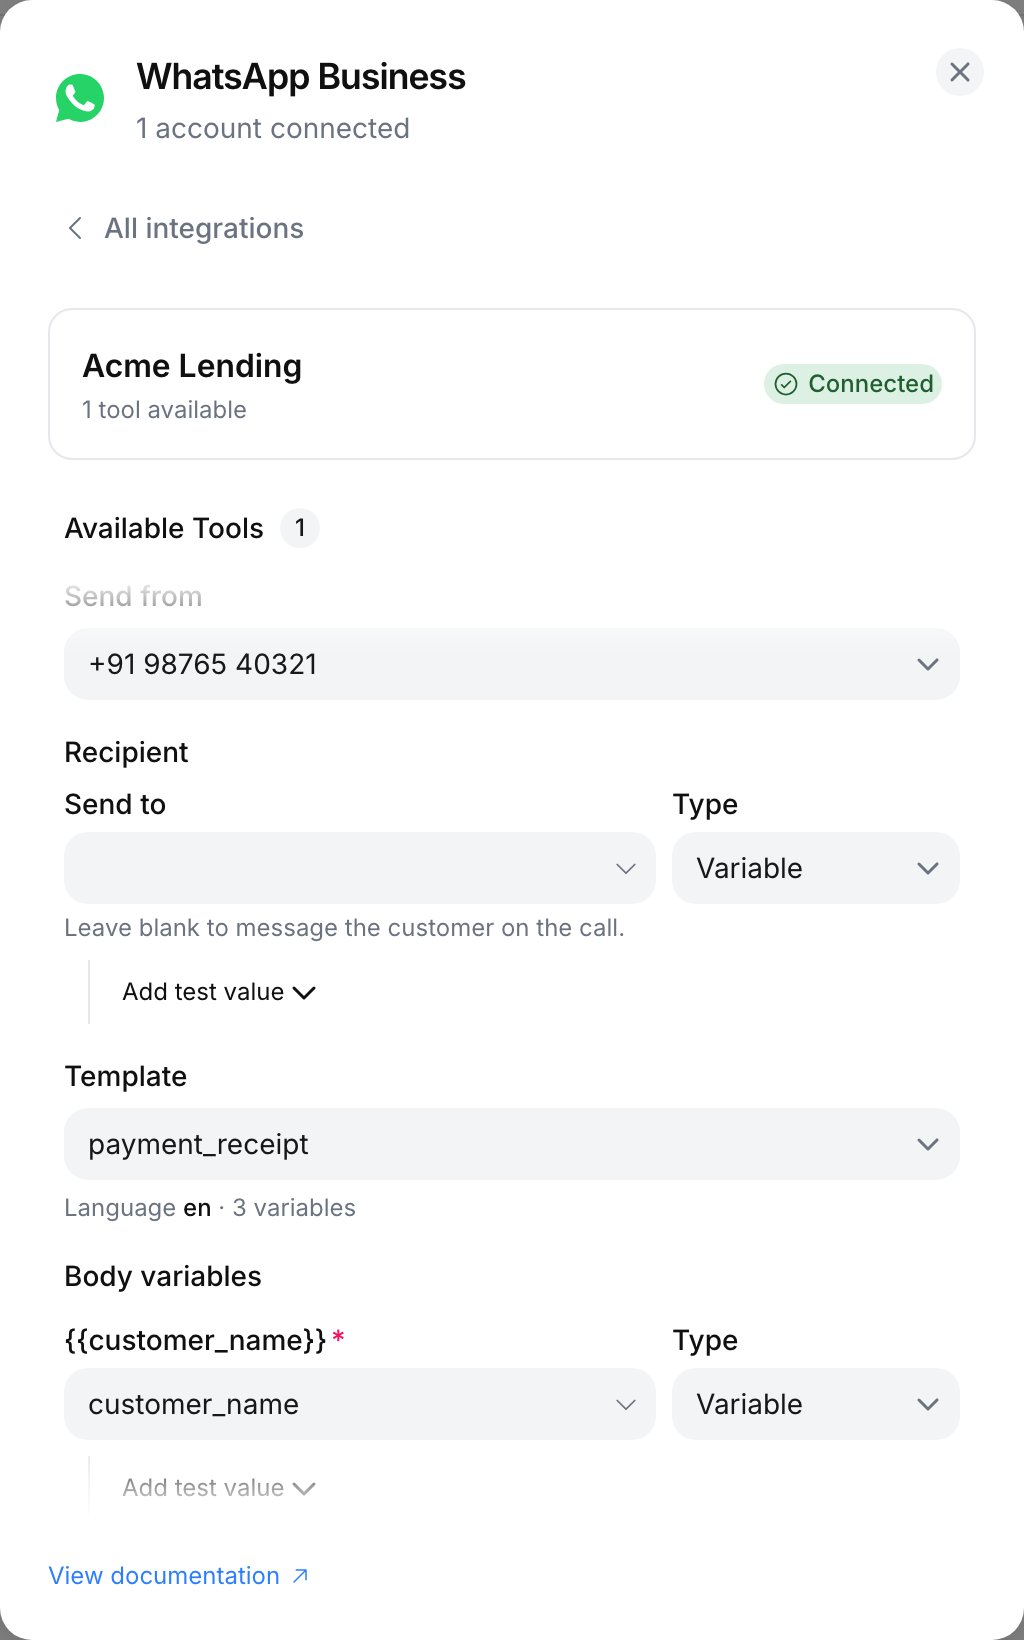
* **Send from**: a registered number on the account. If the field is empty with **No registered WhatsApp numbers on this account**, [register one](/documentation/inventory/tools-integrations/connect-whatsapp#add-a-number) first.
* **Send to**: leave blank to message the customer on the call. To send elsewhere, set it to **Variable** and pick a custom variable, or to **Static** and enter a number such as `+919876543210`.
* Template tool: pick the **Template**; its language and variable count show beneath it. Under **Body variables**, set each variable to **Variable** (a custom variable, filled when the call runs) or **Static** (a fixed value).
* Text tool: write the **Message text**.
**Add test value** gives a variable a sample value. **Run test** sends a real message with those values and reports "Test message sent." **Import** stays disabled until the sender, the template and every variable are set; a test run isn't required.
The tool appears in the **On-call** list as **Send WhatsApp Template** (or **Send WhatsApp Text**) from your WhatsApp Business account.
### Tell the agent when to use it
The agent calls an on-call tool only where the prompt says to. In the prompt editor, type `@` and pick the tool under **On-Call API Settings**; it is inserted as `@||tool_name||` with the tool's own name. Next to it, say when to send and what to say afterwards:
```text theme={null}
If the customer asks for the brochure, send it on WhatsApp with
@||Acme Lending_send_template_message|| and tell them it is on its way to their WhatsApp.
Don't read the link out loud.
```
The template tool is named `_send_template_message` and the text tool `_send_text_message`, where the account name is your WhatsApp Business account's name in Ringg, as shown under **WhatsApp Business**, spaces included. Use the mention the `@` menu inserts.
### Map template variables
Variables are filled from the conversation's [custom variables](/documentation/build-agents/customize-agent-behaviour/custom-variables), so declare them in the agent. They can be passed when the call starts or set by a pre-call tool. For a template `Hi {{1}}, your {{2}} link: {{3}}`:
| Variable row | Type | Value |
| - | - | - |
| `{{1}}` | Variable | `name` |
| `{{2}}` | Static | `renewal` |
| `{{3}}` | Variable | `renewal_url` |
With named variables (`{{customer_name}}`), the rows are labelled with those names instead of numbers.
### Troubleshooting
Shown on the tool call in Logs. **Send WhatsApp Text** was used more than 24 hours after the customer's last message. Use **Send WhatsApp Template**.
Shown in the tool editor. The template was deleted or is no longer approved. Pick another and save.
## Post-call
### Add the tool
The same video as the on-call page; the post-call part starts at 45 seconds.
In the agent editor, select **Tools**, then the **Post-call** tab, and expand **Integration** → **WhatsApp Business** in the side panel, as for the [on-call tool](/documentation/build-agents/customize-agent-behaviour/tools/whatsapp-tools#on-call).
| Field | What to enter |
| - | - |
| **Send from** | A registered number on the account. |
| **Send to** | Blank sends to the customer: the number on a voice call, their WhatsApp number on a chat. Or set a **Variable** or **Static** number. |
| **Template** | An approved template. |
| **Body variables** | One row per variable, each **Variable** (a custom variable of the conversation) or **Static**. |
**Add test value**, **Run test** and **Import** work as on the [on-call tool](/documentation/build-agents/customize-agent-behaviour/tools/whatsapp-tools#on-call).
The tool is listed on the **Post-call** tab, and the template is sent after every conversation this agent handles.
### Common set-ups
Add the tool to a voice agent's post-call tools with a Utility template such as:
```text theme={null}
Hi {{1}}, thanks for speaking with us about {{2}}. Reply here if you have any
questions and we'll pick up where we left off.
```
Map `{{1}}` to the `name` custom variable and `{{2}}` to a static product name. Leave **Send to** blank so it goes to the number that was called.
Add the tool to the WhatsApp agent itself. It runs when the chat closes, which for a customer who stops replying is after the agent's idle timeout (3 hours by default). See [when a chat opens and closes](/documentation/build-agents/agents/whatsapp-agents/create-an-agent#when-a-chat-opens-and-closes).
Set **Send to** to **Static** with a team member's number, and use a template whose variables carry the details you need.
## Next steps
Calling window, voicemail, interruptions and call length.
Call yourself and check the send in Logs.
This documentation is built and hosted on [Mintlify](https://mintlify.com), a developer documentation platform.